
the fast & minimal camera
dedicated to raw Bayer photography

USER'S MANUAL
Basics
What is Bayer RAW?
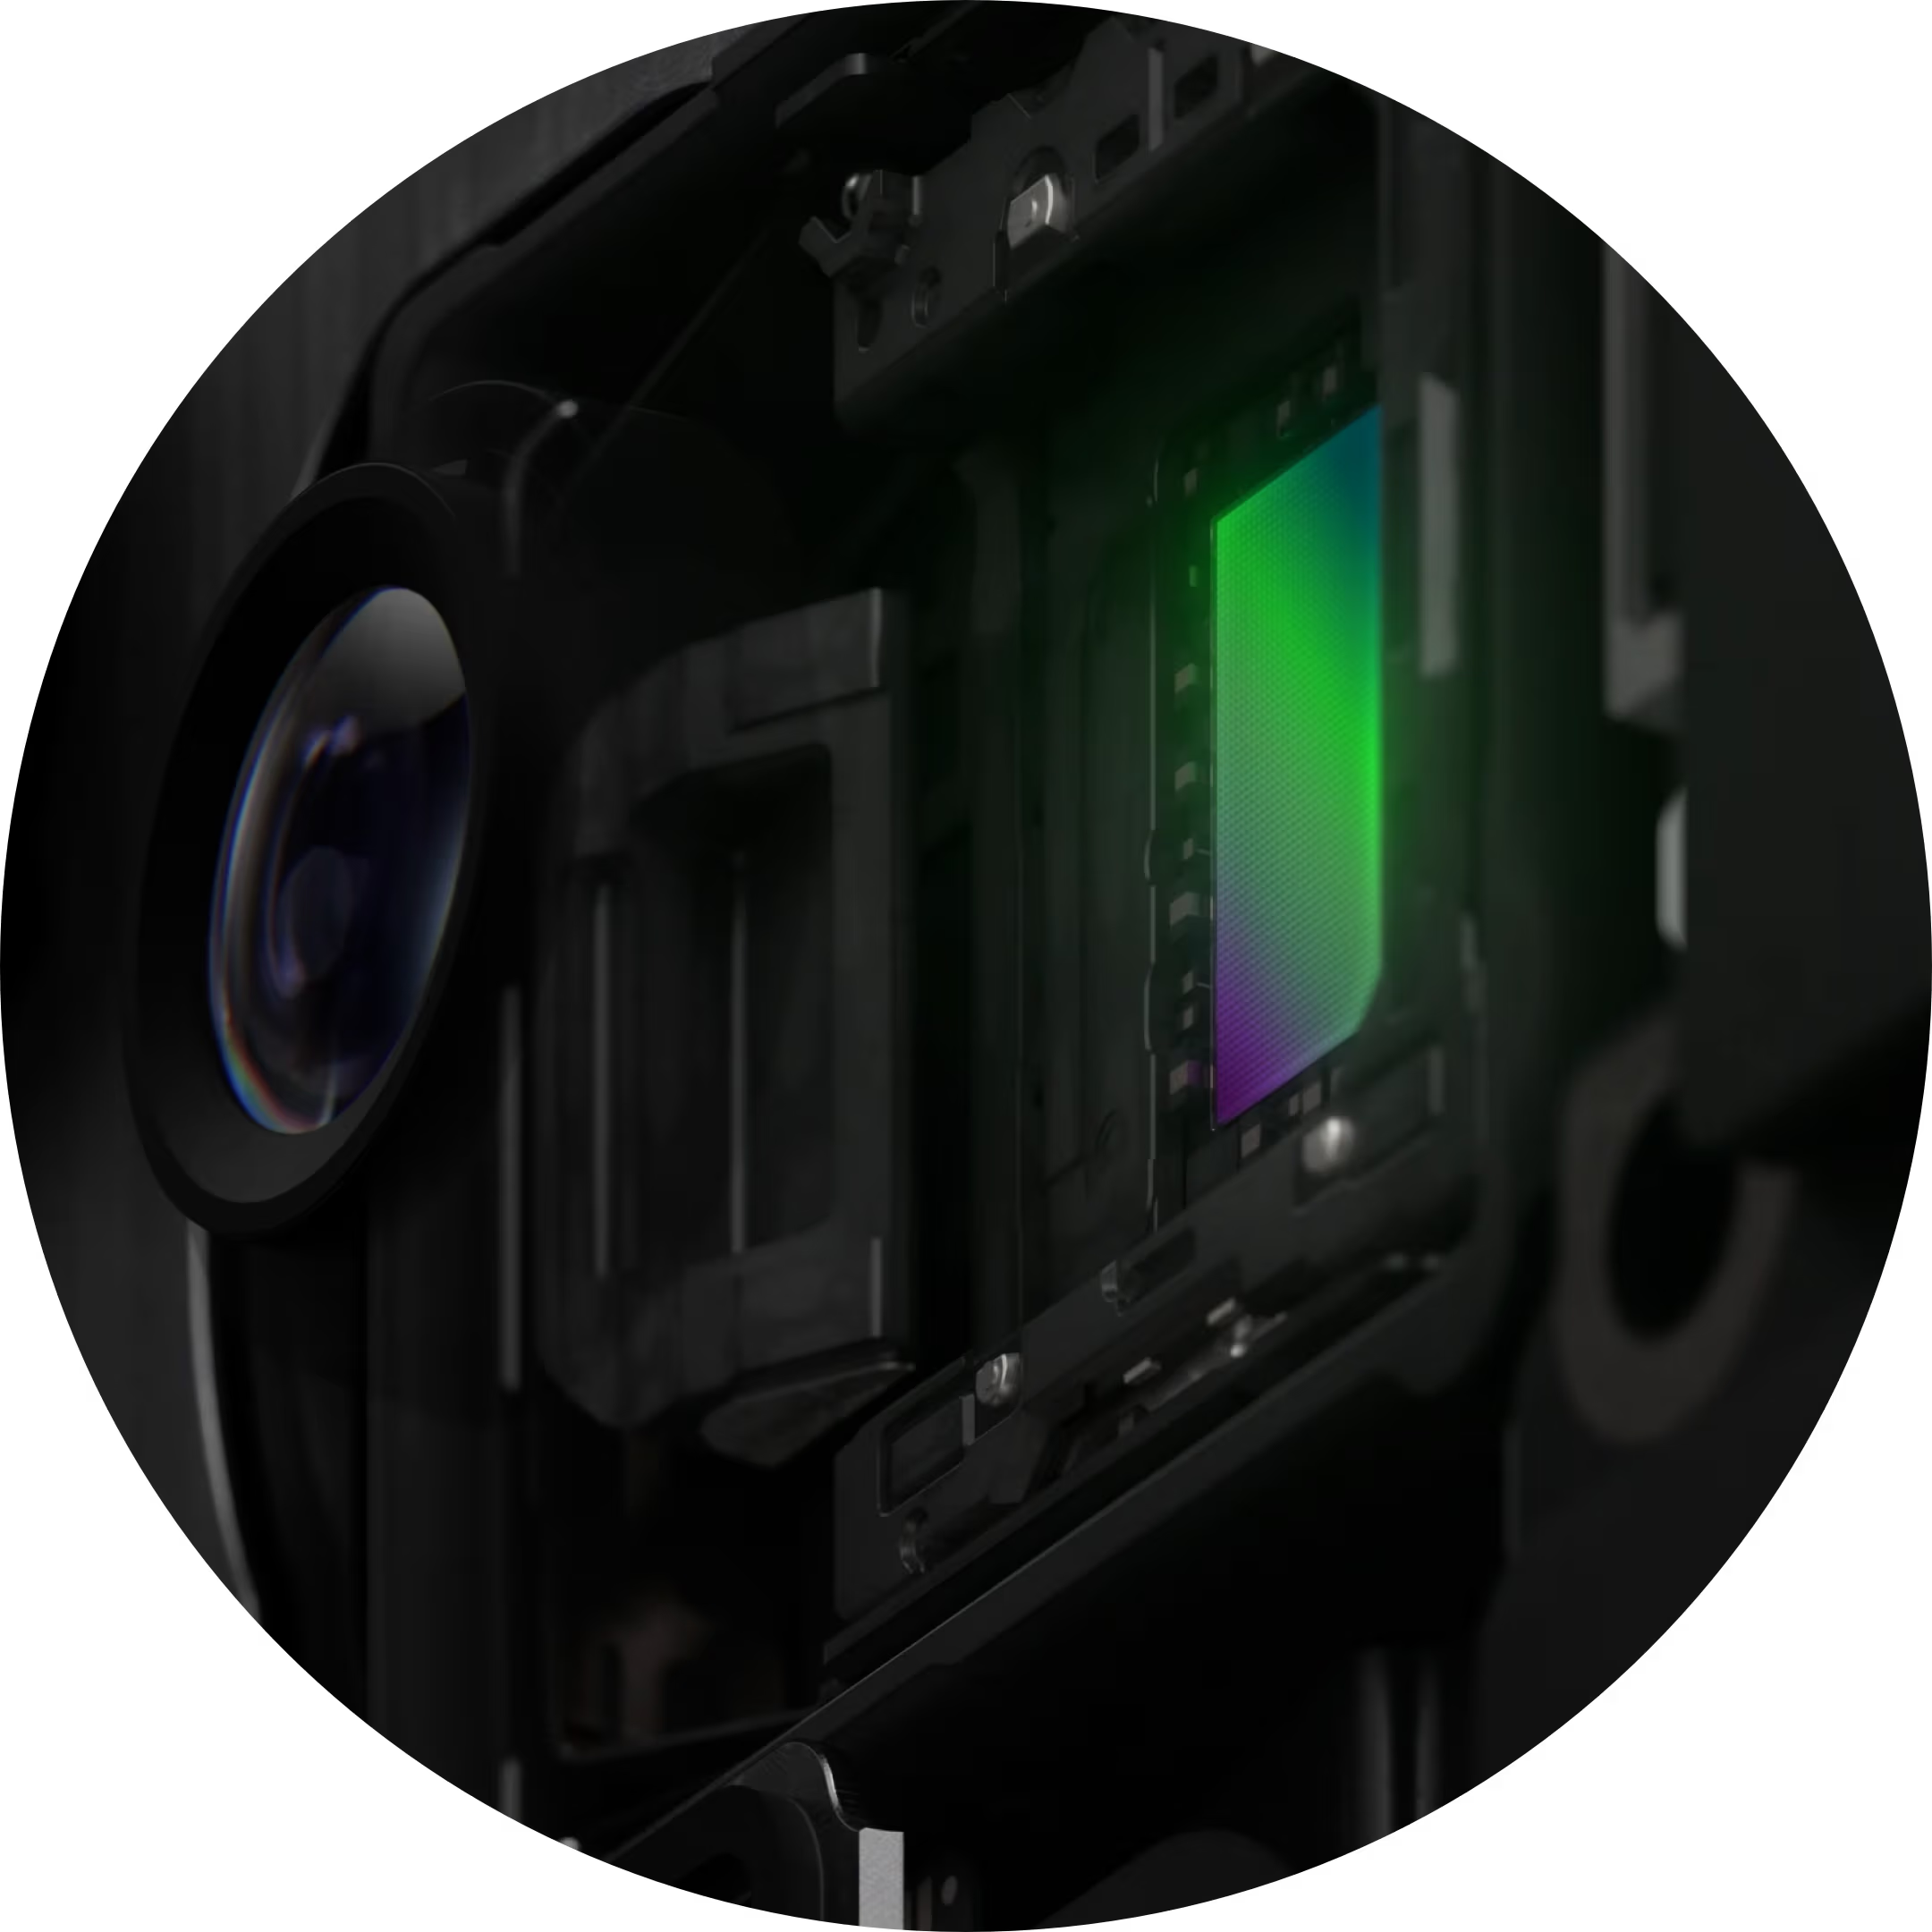
Simply put, it is data straight from the camera sensor chip, before a number of transformations are applied to turn it into a final picture. That's why it is called "raw" - it's as unprocessed as one can get.
In the camera world, it has historically been called just RAW - but you can also find it referred to as "Bayer RAW" to be unambiguous, especially in the context of Apple products where the existence of the Apple ProRAW format makes things confusing.
All iPhone models back to the iPhone 4s can capture Bayer RAW photos (but the feature has never been available in Apple's Camera app; you need to use an app like Bayer Cam)
Because a Bayer RAW capture is raw data, it is not a "finished", or "processed", image. A Bayer RAW capture must be processed into a final photograph; the steps to do so are described below.
Simply put, it is data straight from the camera sensor chip, before a number of transformations are applied to turn it into a final picture. That's why it is called "raw" - it's as unprocessed as one can get.
In the camera world, it has historically been called just RAW - but you can also find it referred to as "Bayer RAW" to be unambiguous, especially in the context of Apple products where the existence of the Apple ProRAW format makes things confusing.
All iPhone models back to the iPhone 4s can capture Bayer RAW photos (but the feature has never been available in Apple's Camera app; you need to use an app like Bayer Cam)
Because a Bayer RAW capture is raw data, it is not a "finished", or "processed", image. A Bayer RAW capture must be processed into a final photograph; the steps to do so are described below.
Demosaicking
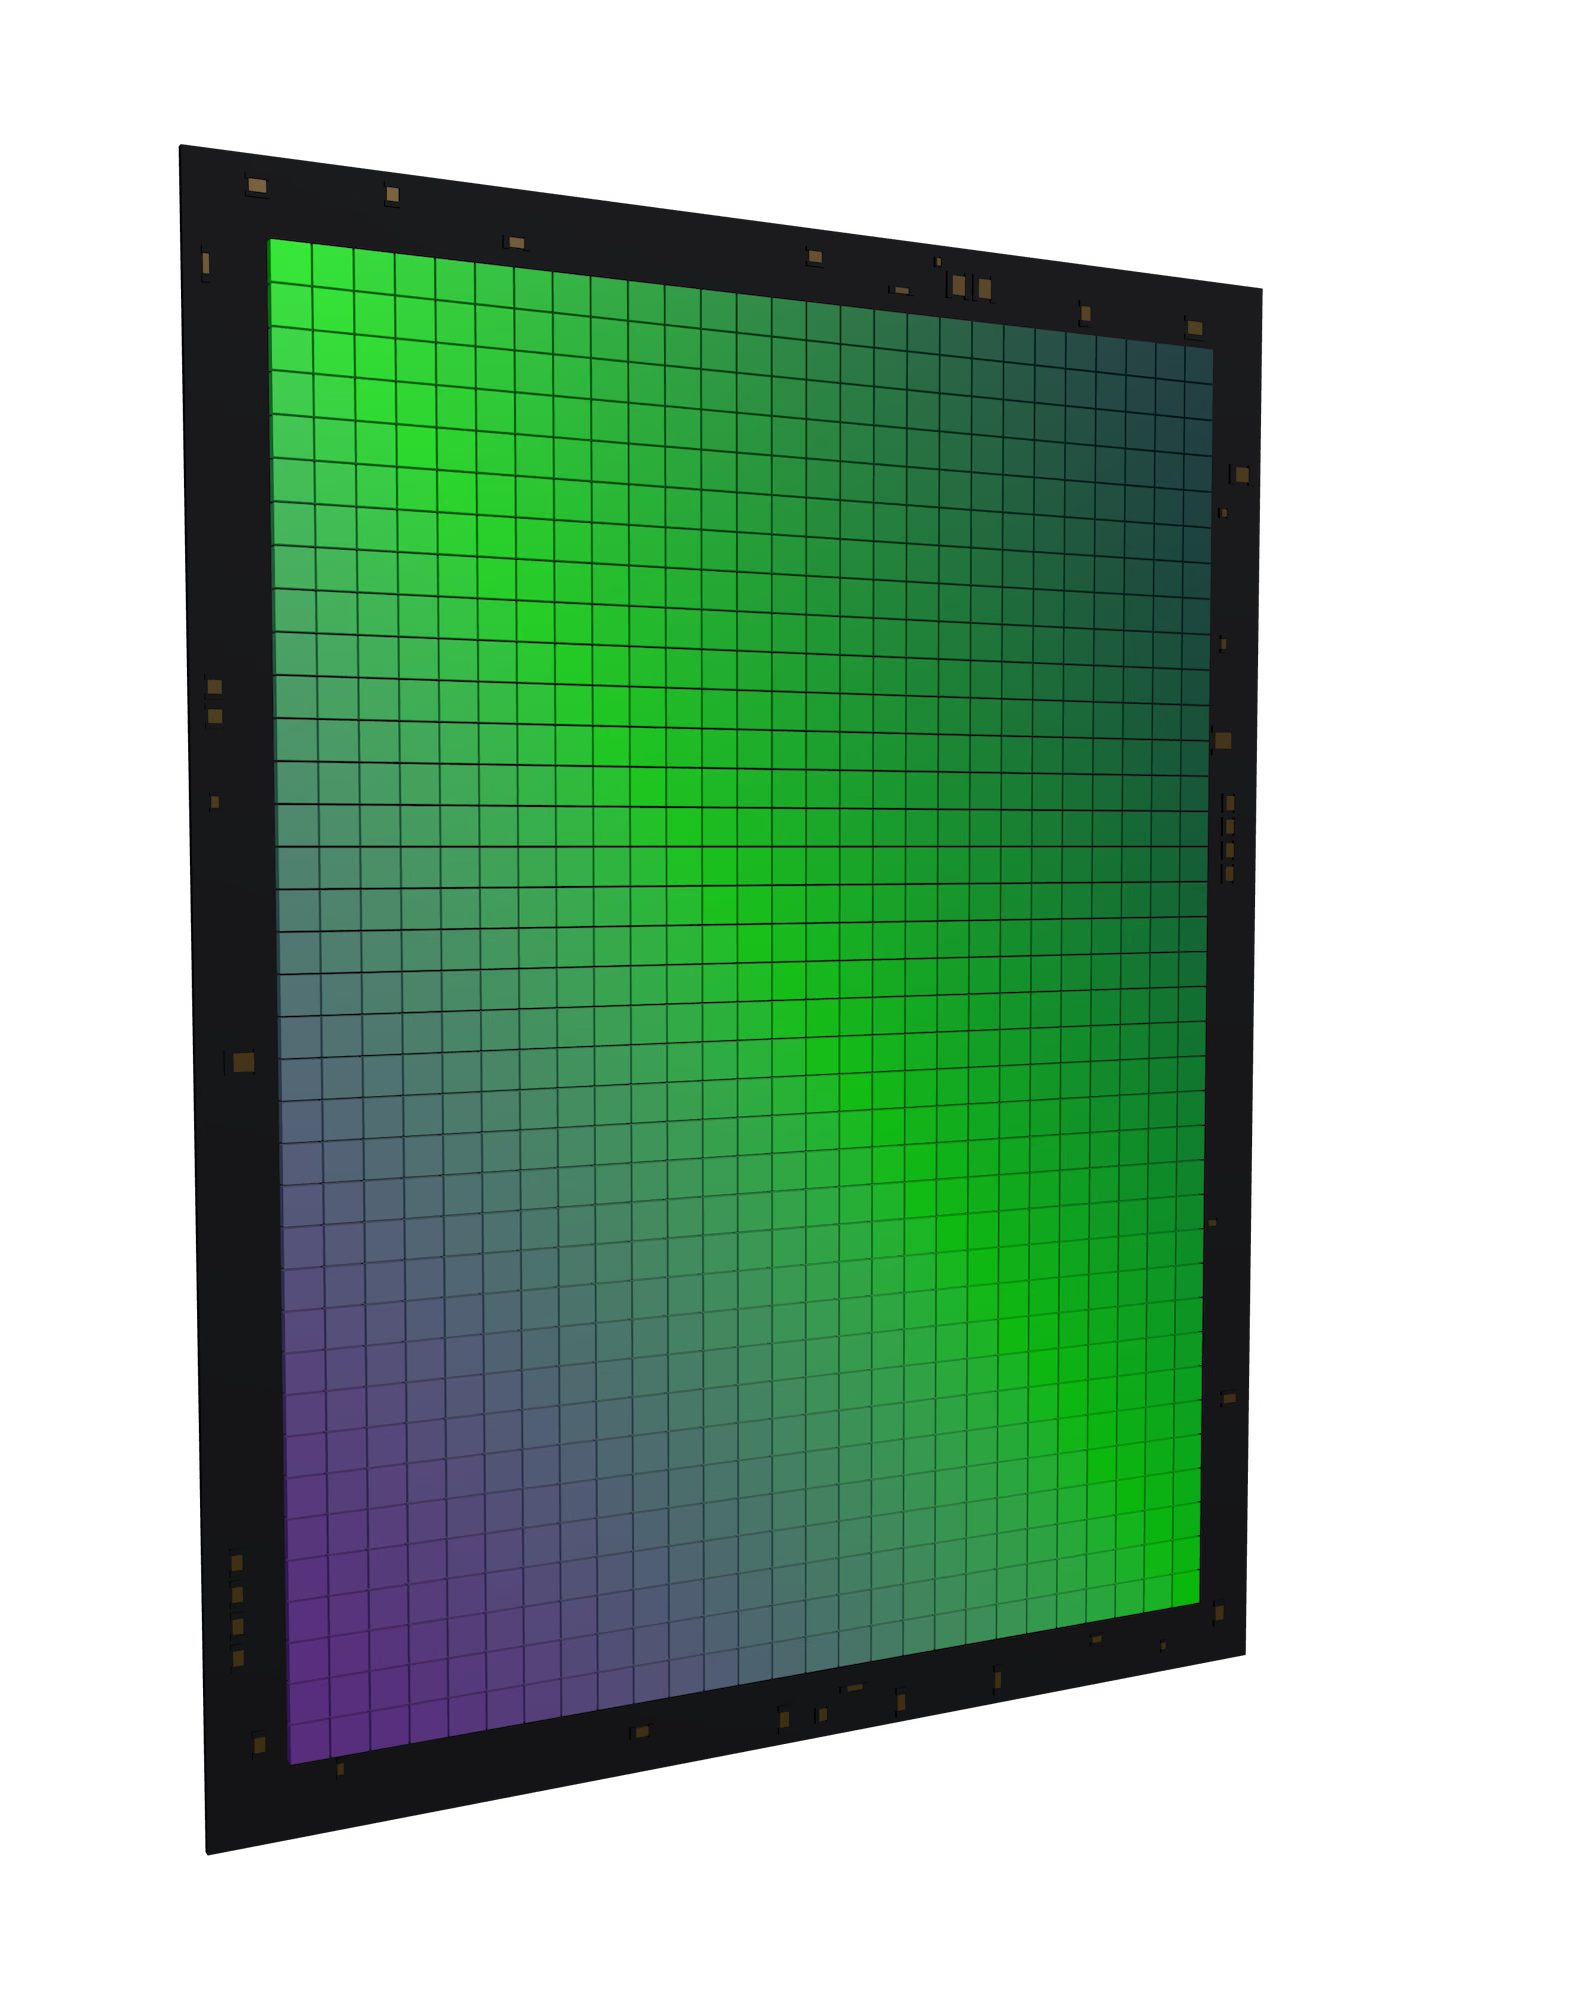
To understand how Bayer RAW information is processed into an image, we need to learn a bit about the camera sensor that creates it.
Here is a simplified sensor, with a grid of 36×27 "pixels" that record light - a regular iPhone one has 4032x3024, or over 100 times larger.
Each "sensor pixel" (an electronic photosite) can record only the intensity of light, not color.
Here is a simplified sensor, with a grid of 36×27 "pixels" that record light - a regular iPhone one has 4032x3024, or over 100 times larger.
Each "sensor pixel" (an electronic photosite) can record only the intensity of light, not color.
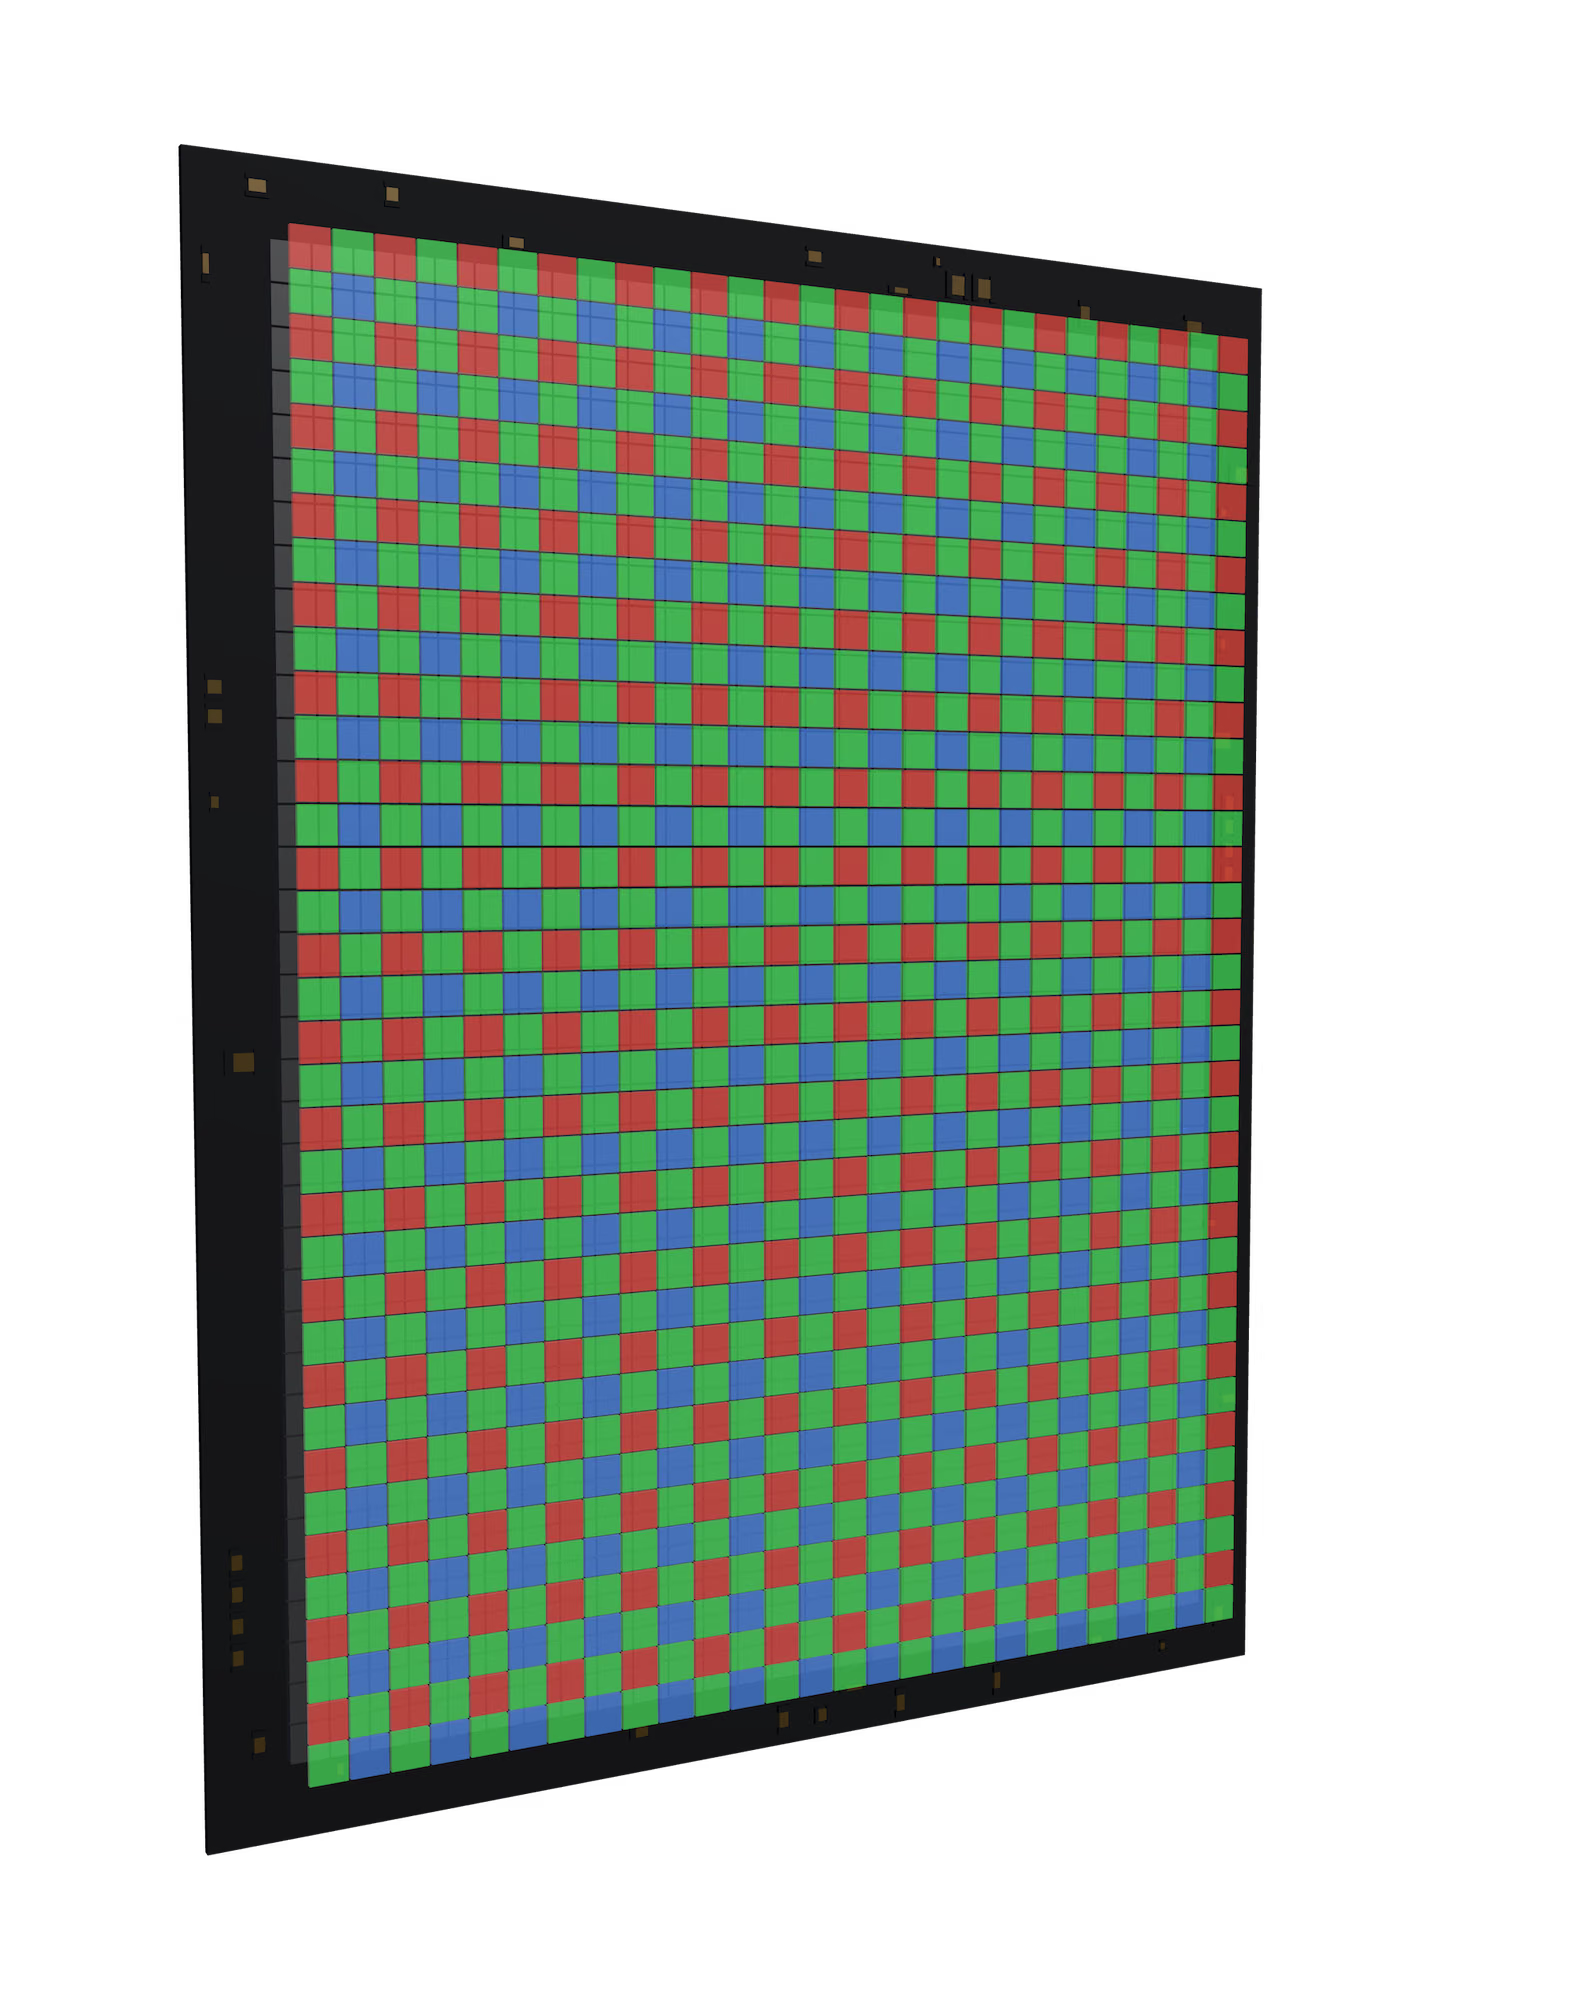
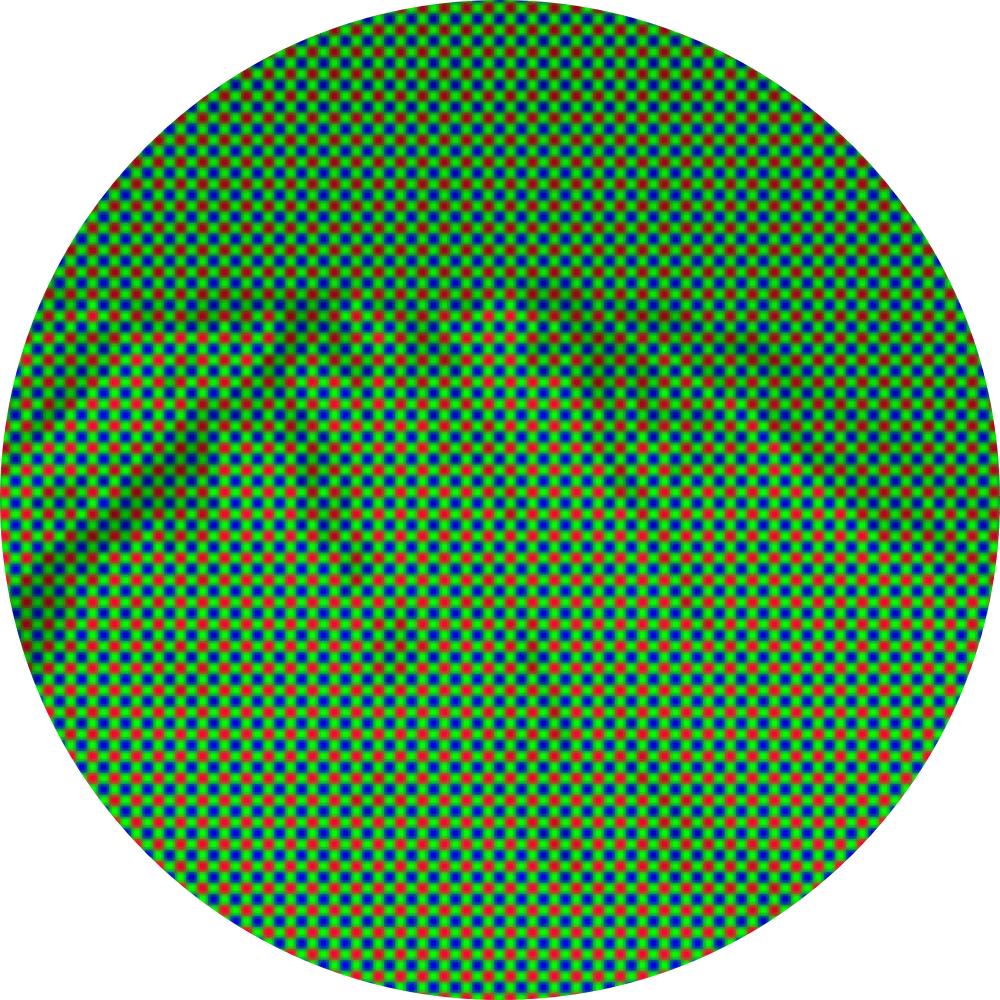
So how can we produce color photos? The most commonly used approach is to overlay those photosites with a color filtered array (CFA), that alternates red, green, and blue filters in a grid, such that we are now recording the a mosaic of isolated light intensities for red/green/blue components.
Why those colors specifically? Human vision is trichromatic, which means the human eye is sensitive to 3 wavelengths of color, roughly corresponding to red, green, blue. Through a complex process, the brain combines its perception of those 3 wavelengths into what we refer to as "color".
Why those colors specifically? Human vision is trichromatic, which means the human eye is sensitive to 3 wavelengths of color, roughly corresponding to red, green, blue. Through a complex process, the brain combines its perception of those 3 wavelengths into what we refer to as "color".
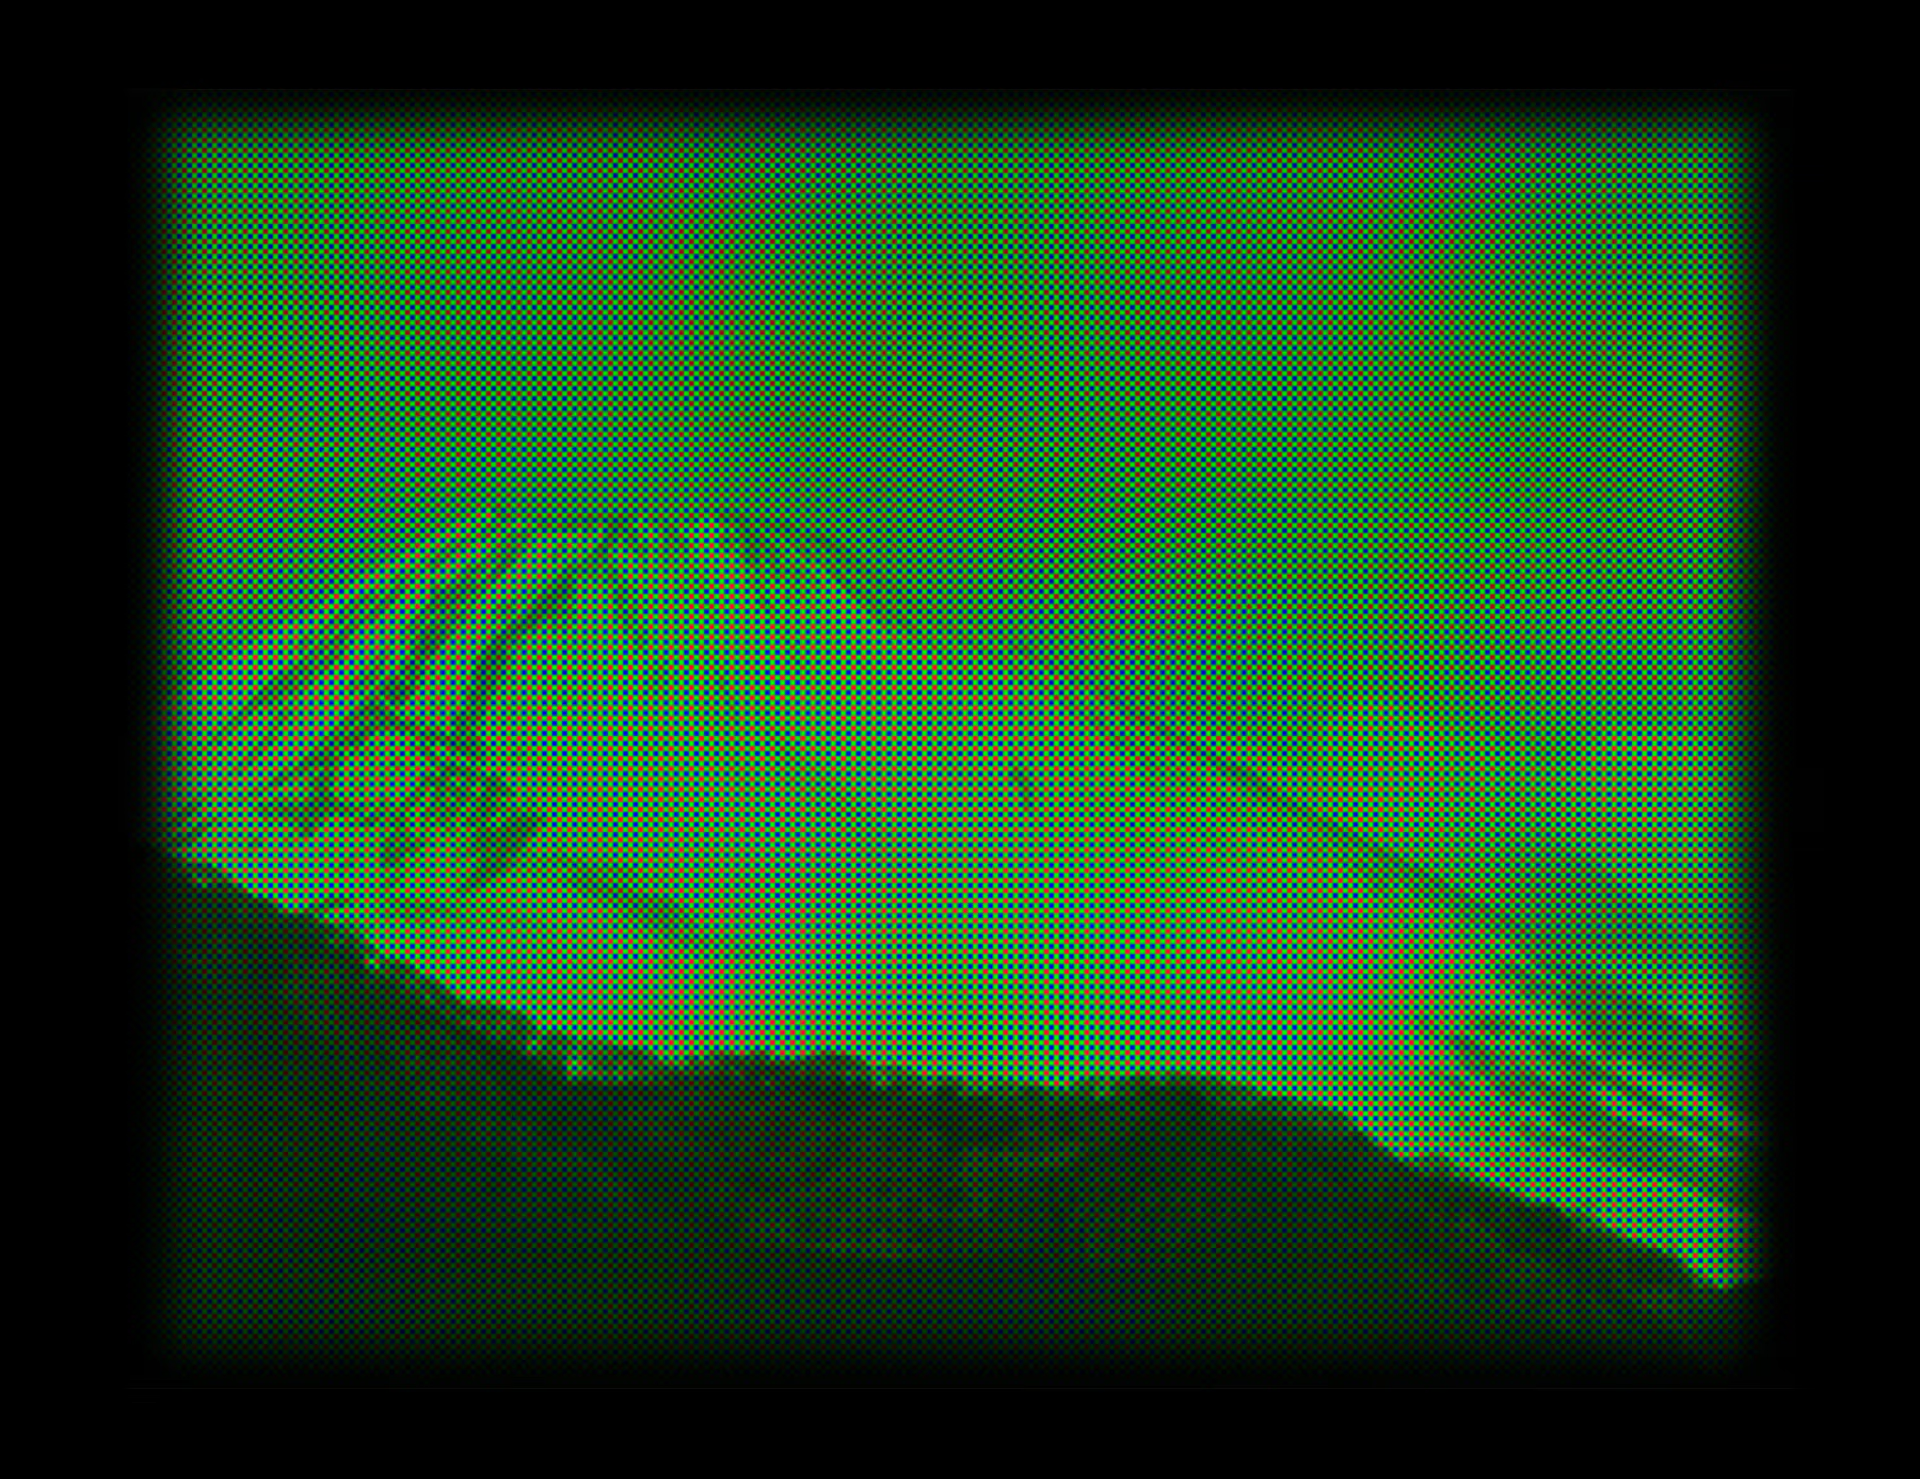
This is what "RAW capture" means: capturing this matrix of red/green/blue light intensities. They still need to be turned from individual color measurements into unified color for viewing; this process is known as "demosaicking".
Demosaicking means turning the raw, single-channel color pixels from a camera sensor into RGB pixels.
There are many different demosaicking algorithms, with different tradeoffs - for special photographic applications like astrophotography where stars can resolve to a single pixel on the sensor, the final result can vary significantly.
Bayer RAW is often called a "digital negative": because it captures raw data, prior to demosaicking, the exposure can be reprocessed endlessly at a later date.
Demosaicking means turning the raw, single-channel color pixels from a camera sensor into RGB pixels.
There are many different demosaicking algorithms, with different tradeoffs - for special photographic applications like astrophotography where stars can resolve to a single pixel on the sensor, the final result can vary significantly.
Bayer RAW is often called a "digital negative": because it captures raw data, prior to demosaicking, the exposure can be reprocessed endlessly at a later date.
Additional Processing
Even after demosaicking, the image is not ready for viewing. It needs to undergo a number of subsequent processing steps- here are a few fundamental ones, but there are more:
- Geometric correction: image quality on lenses often degrades closer to edges and corners, and a lens might slightly distort a scene due to its optical design. Because lenses are optical systems with known characteristics, it is possible to apply geometric corrections to the image to attenuate some of the lens' flaws.
- Color correction/White balance: After demosaicking, the colors produced still don't appear correct to our eye, and need to be balanced. Additionally, what we perceive to be "white" in the world is highly dependent on factors like ambient lighting. Therefore, to properly depict colors in a color photo, we need a way to determine the white point in the photo.
- Denoising: noise, or random variation in the measured data, is inescapable. It's what is responsible for colored specks in low light. A denoising step can remove, or at least attenuate, this noise.
- Sharpening: edges in photos taken on a digital sensor can be blurry, especially due to artefacts from the demosaicking step. Sharpening recovers those edges to an extent.
Each of these processing steps are configurable, and tweaking them can highly change the final appearance of the image.
This is why Bayer RAW is so valued as a format: it gives you as much control as can be had over the production of a final, processed, ready-for-viewing photo.
- Geometric correction: image quality on lenses often degrades closer to edges and corners, and a lens might slightly distort a scene due to its optical design. Because lenses are optical systems with known characteristics, it is possible to apply geometric corrections to the image to attenuate some of the lens' flaws.
- Color correction/White balance: After demosaicking, the colors produced still don't appear correct to our eye, and need to be balanced. Additionally, what we perceive to be "white" in the world is highly dependent on factors like ambient lighting. Therefore, to properly depict colors in a color photo, we need a way to determine the white point in the photo.
- Denoising: noise, or random variation in the measured data, is inescapable. It's what is responsible for colored specks in low light. A denoising step can remove, or at least attenuate, this noise.
- Sharpening: edges in photos taken on a digital sensor can be blurry, especially due to artefacts from the demosaicking step. Sharpening recovers those edges to an extent.
Each of these processing steps are configurable, and tweaking them can highly change the final appearance of the image.
This is why Bayer RAW is so valued as a format: it gives you as much control as can be had over the production of a final, processed, ready-for-viewing photo.
Bit Depth
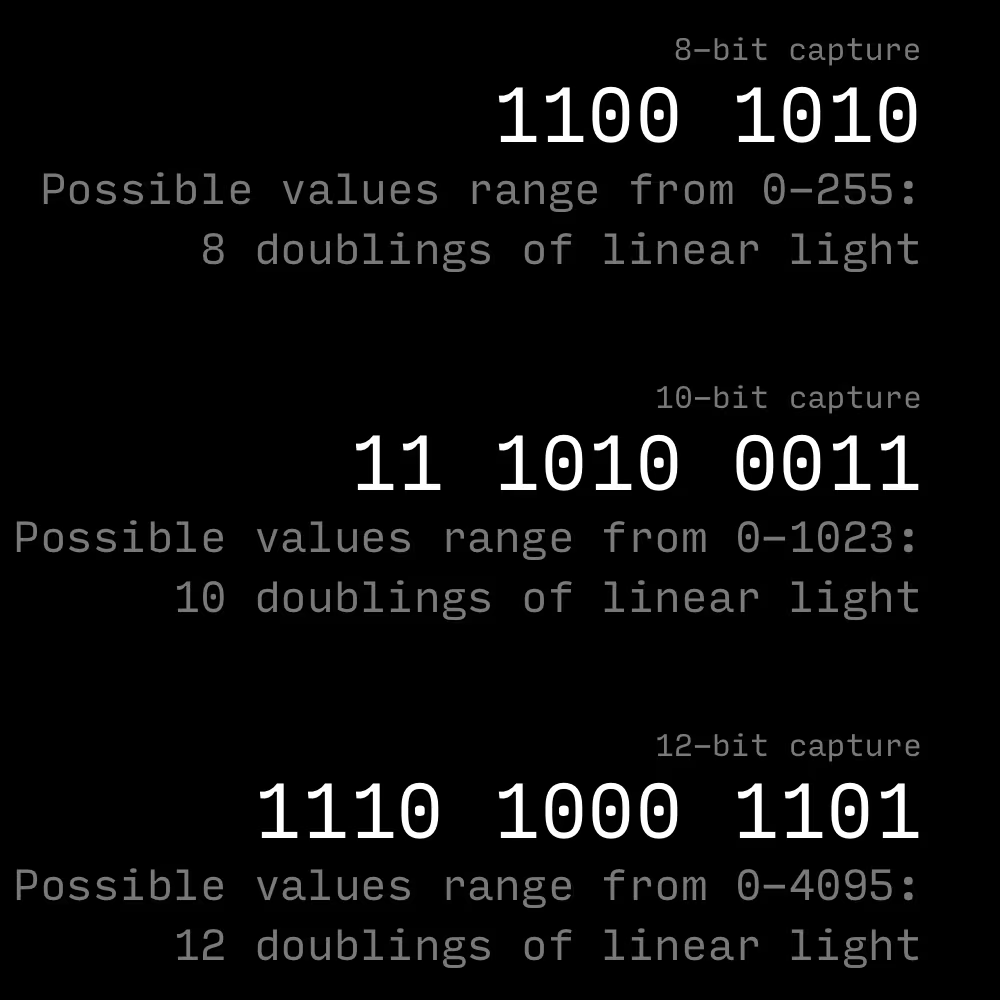
A key notion to be familiar with when talking about RAW files is bit depth. This is the number of bits that are used to represent each color component (red, green, blue) for the pixels in the image.
The bit depth of a digital photograph can be loosely equated to the dynamic range of a film photograph: the luminosity values for each pixel are stored on n-bits, where every increase of n by 1 leads to a doubling in light values.
Most displays are 8-bit per color channel (= 24 bits for RGB), and that's the bit depth standard JPEG uses.
For photographic capture, working in 8-bit is problematic because it means you have no headroom or floorroom to shape the image. Hence advanced digital cameras offer 10 or 12 bit capture, or even 14 or 16 bit capture at the very high end.
The bit depth of a digital photograph can be loosely equated to the dynamic range of a film photograph: the luminosity values for each pixel are stored on n-bits, where every increase of n by 1 leads to a doubling in light values.
Most displays are 8-bit per color channel (= 24 bits for RGB), and that's the bit depth standard JPEG uses.
For photographic capture, working in 8-bit is problematic because it means you have no headroom or floorroom to shape the image. Hence advanced digital cameras offer 10 or 12 bit capture, or even 14 or 16 bit capture at the very high end.
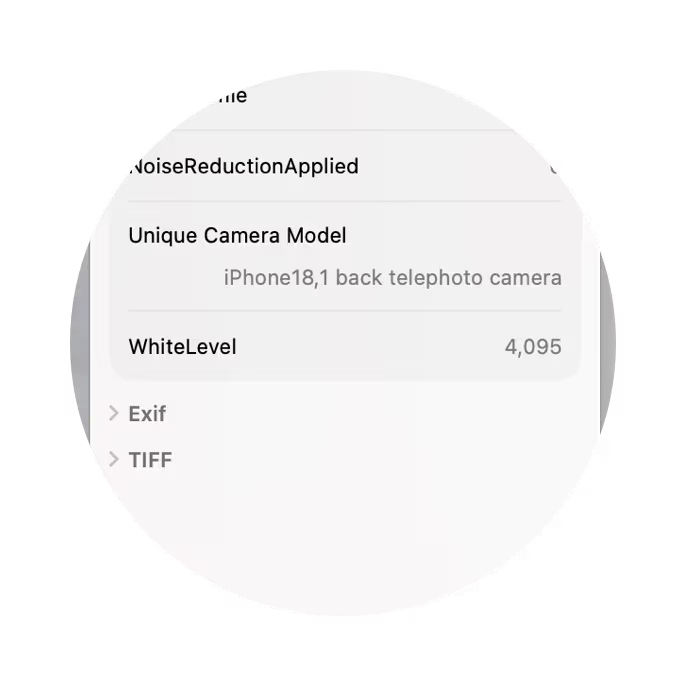
Every iPhone device to this day shoots 12-bit Bayer RAW files.
One way you can independently verify the bit depth of an image is to inspect the WhiteLevel field in the DNG section of the file's EXIF metadata - it will be set to 4095 (212-1) for 12-bit, and 1023 (210-1) for 10-bit.
One way you can independently verify the bit depth of an image is to inspect the WhiteLevel field in the DNG section of the file's EXIF metadata - it will be set to 4095 (212-1) for 12-bit, and 1023 (210-1) for 10-bit.
Bayer RAW vs Apple ProRAW
There is often confusion between Bayer RAW and Apple ProRAW.
Apple ProRAW was introduced on iPhone 12 Pro (with iOS 14.3), and is available on all subsequent Pro models - but only Pro models. Non-Pro iPhone devices (including iPhone Air) do not support Apple Pro RAW capture.
Apple's stock Camera app, the one that comes preloaded on iPhone, can capture Apple ProRAW.
On the other hand, a 3rd-party app such as Bayer Cam is needed to shoot Bayer RAW (3rd party apps can capture Apple ProRAW too).
Apple ProRAW was introduced on iPhone 12 Pro (with iOS 14.3), and is available on all subsequent Pro models - but only Pro models. Non-Pro iPhone devices (including iPhone Air) do not support Apple Pro RAW capture.
Apple's stock Camera app, the one that comes preloaded on iPhone, can capture Apple ProRAW.
On the other hand, a 3rd-party app such as Bayer Cam is needed to shoot Bayer RAW (3rd party apps can capture Apple ProRAW too).
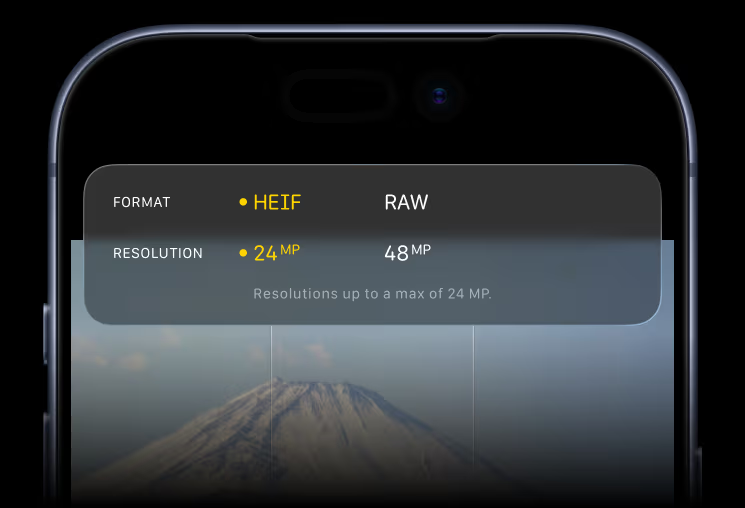
The confusion stems from two things:
- The stock Apple Camera app displays "RAW" in its format picker, when it actually means "Apple ProRAW".
- Despite the naming, Bayer RAW and Apple ProRAW are actually two quite different formats.
The table below sums up the key differences between Bayer RAW and Apple Pro RAW.
- The stock Apple Camera app displays "RAW" in its format picker, when it actually means "Apple ProRAW".
- Despite the naming, Bayer RAW and Apple ProRAW are actually two quite different formats.
The table below sums up the key differences between Bayer RAW and Apple Pro RAW.
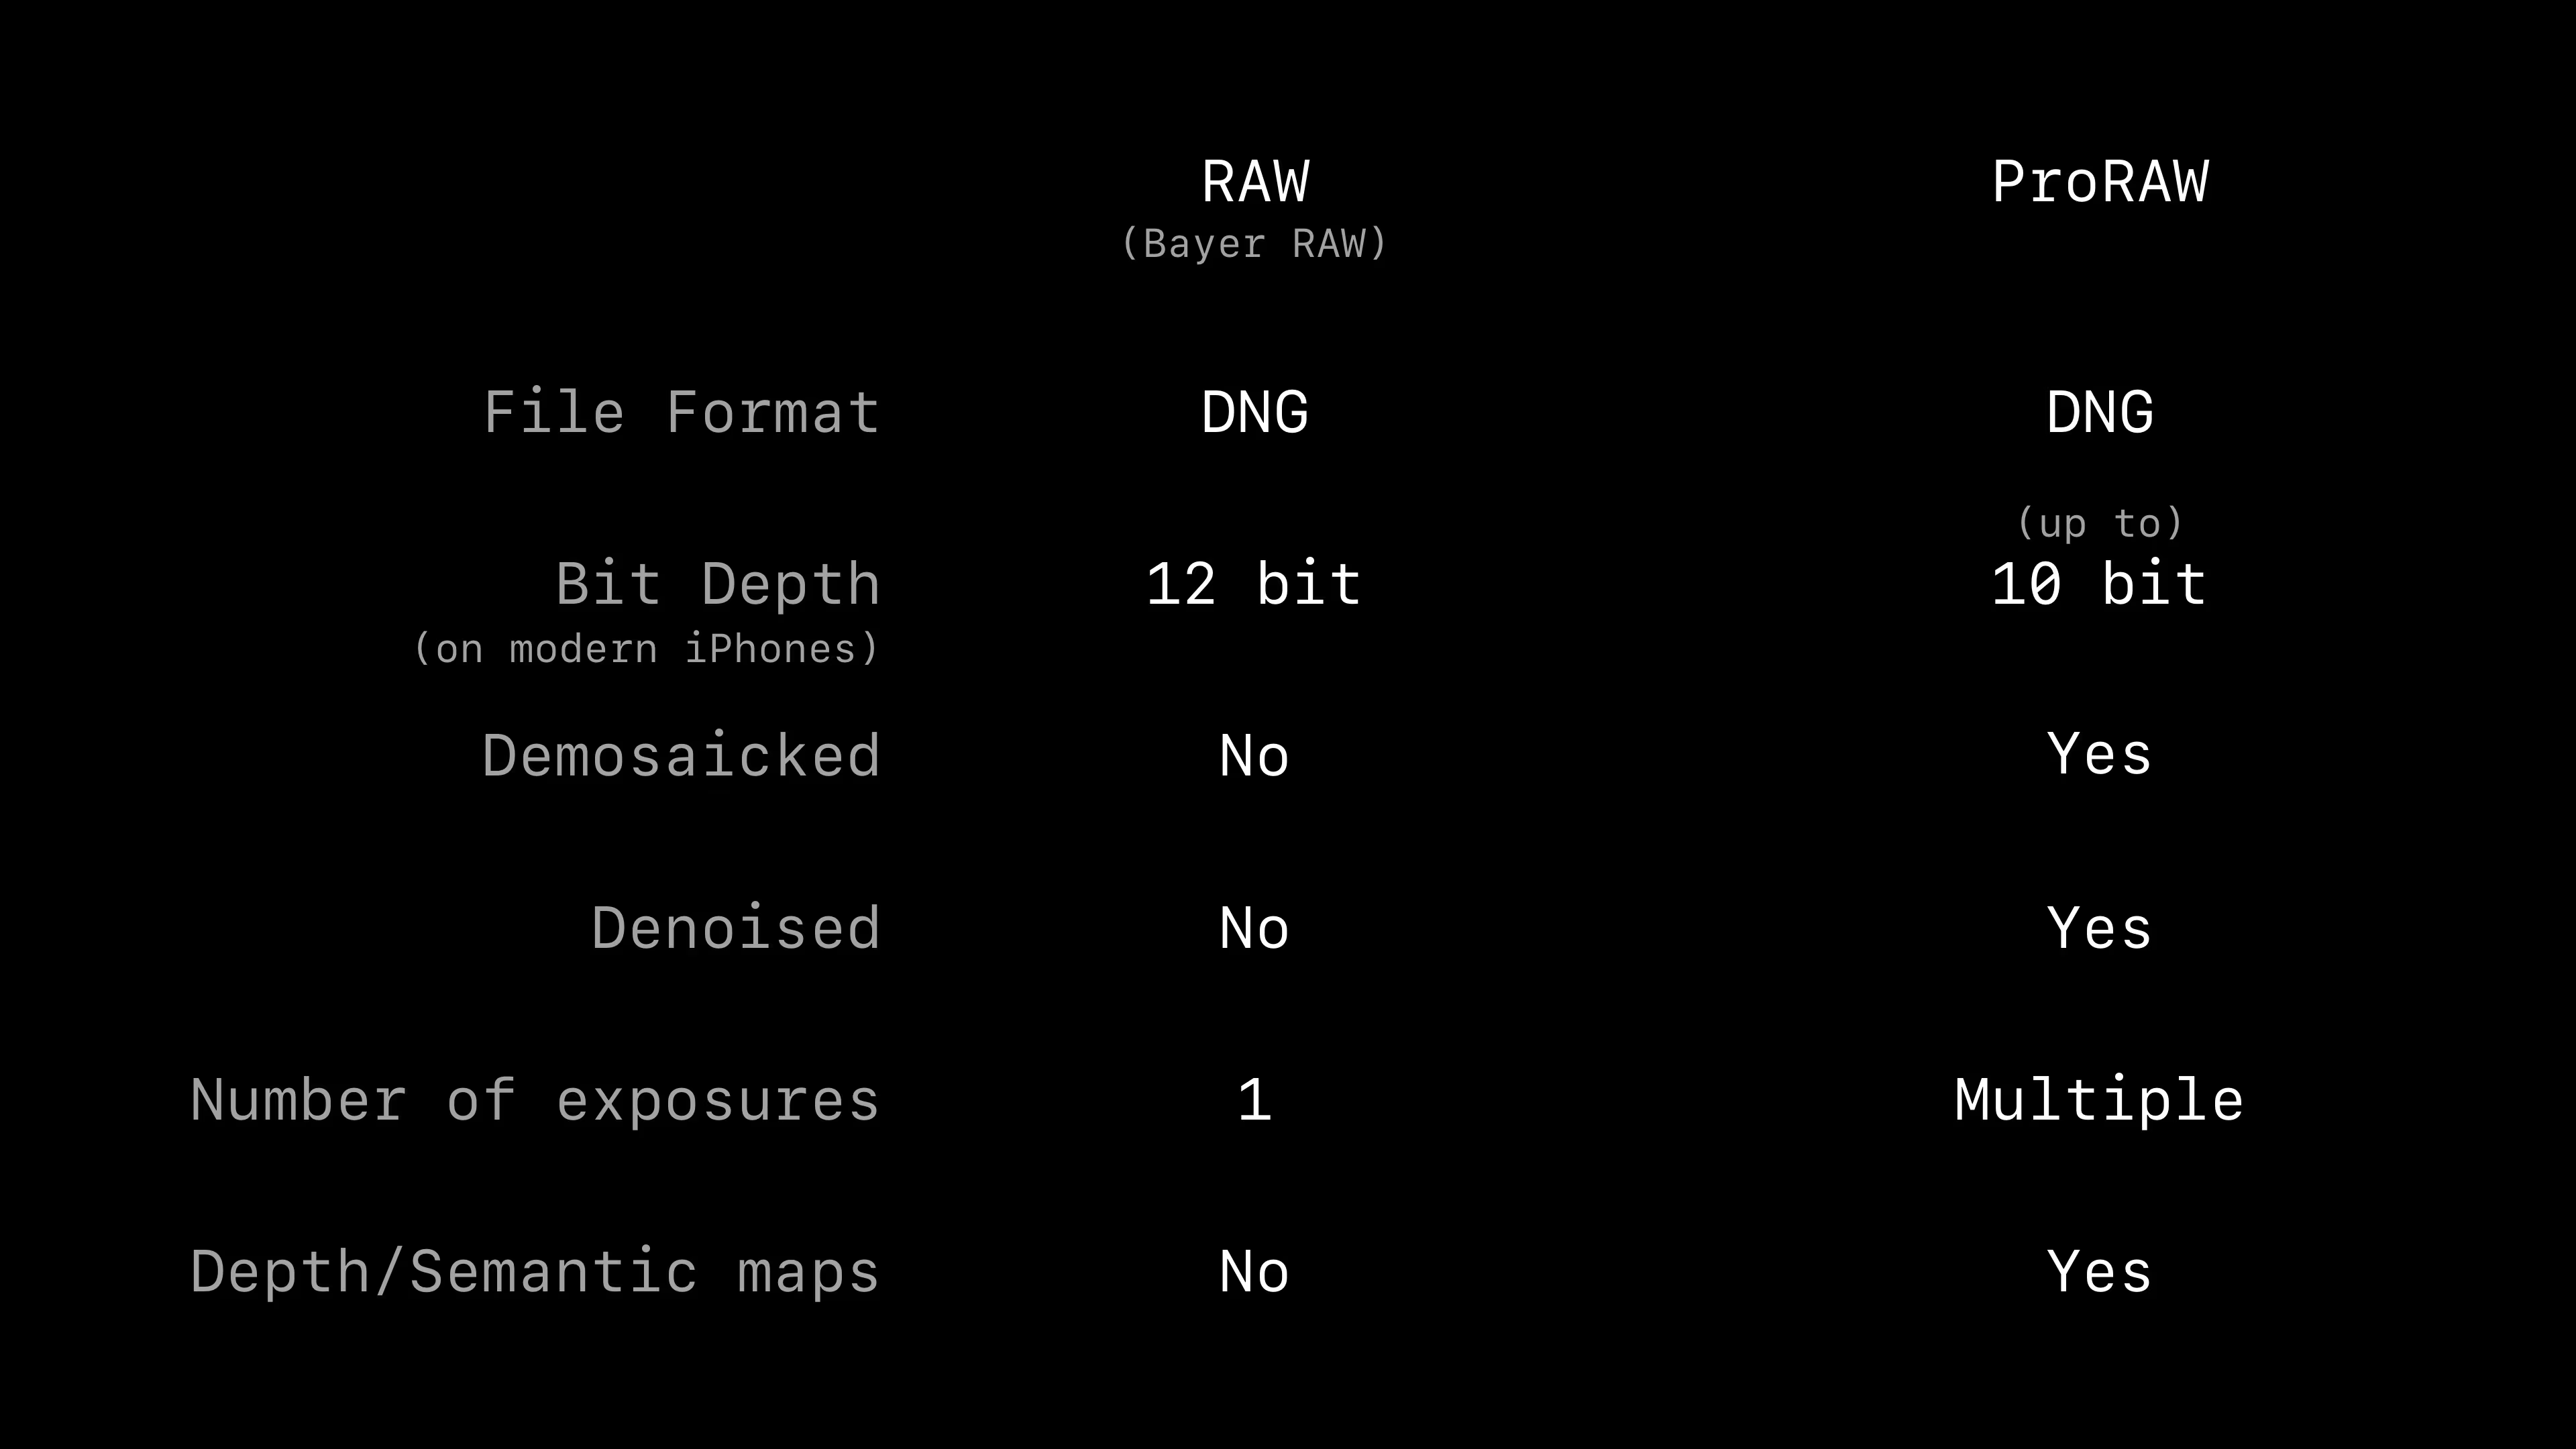
Apple ProRAW is a processed format. From the moment the file is created, there are decisions about its rendering (demosaicking, denoising) baked into the file itself, that cannot be undone - this makes it fundamentally different from Bayer RAW.
Apple ProRAW does allow for some editing latitude: parameters like white balance, tone mapping, or sharpening can be edited after the fact, which is not possible with other processed formats like JPEG or HEIC.
Apple ProRAW does allow for some editing latitude: parameters like white balance, tone mapping, or sharpening can be edited after the fact, which is not possible with other processed formats like JPEG or HEIC.
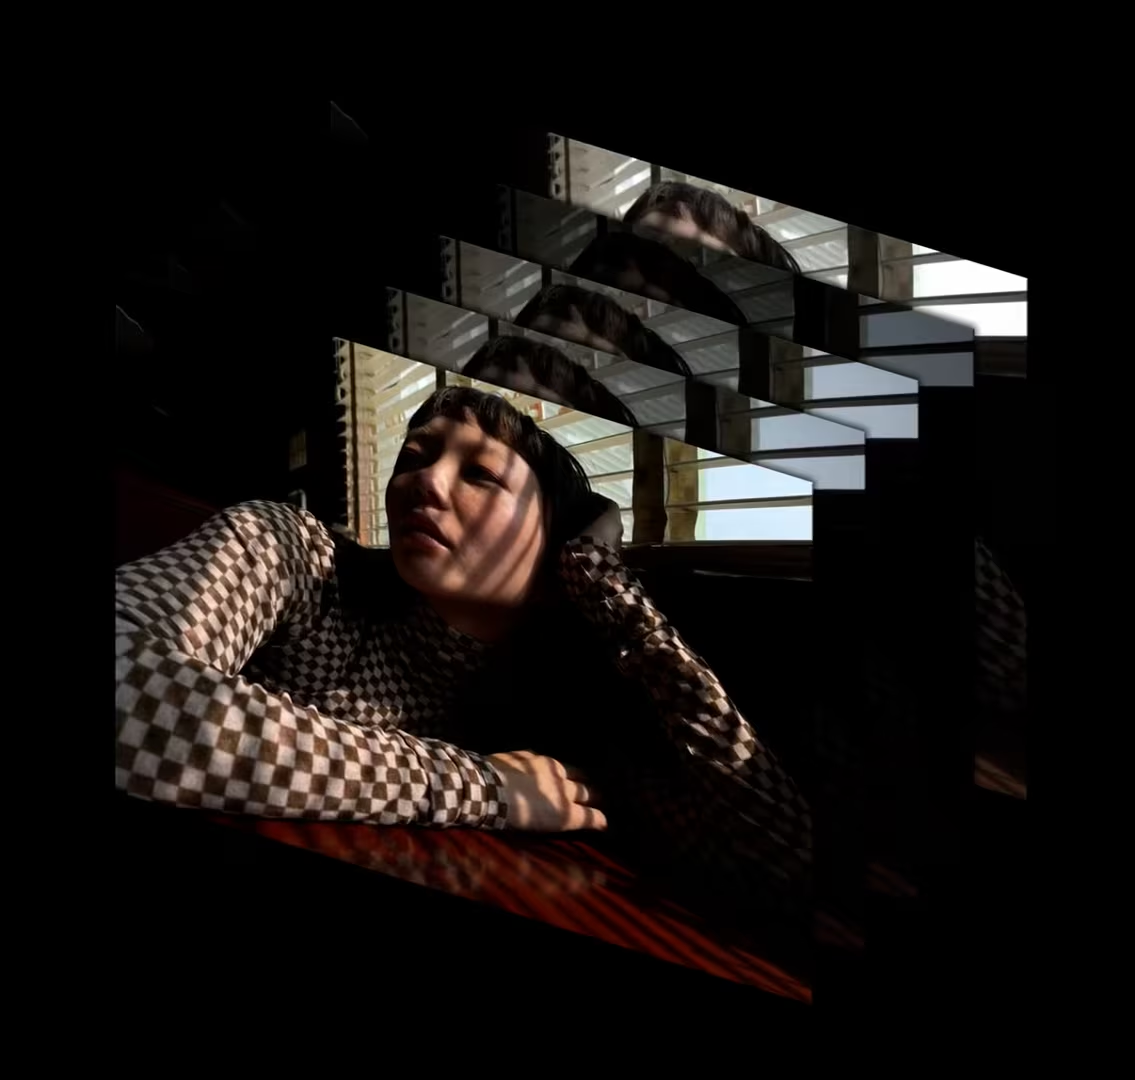
Another key way in which Bayer RAW and Apple ProRAW differ is that a Bayer RAW photo is produced from a single sensor exposure, whereas an Apple ProRAW photo is a composite from multiple exposures.
Apple ProRAW uses this technique to produce a high definition range (HDR) image, with little to no detail lost in either the shadows or highlights.
There is a clear upside to doing this; but it does mean that Apple ProRAW photos are fundamentally computational, and the notion of a single ISO or shutter speed for such a photo becomes quite fuzzy.
Apple ProRAW uses this technique to produce a high definition range (HDR) image, with little to no detail lost in either the shadows or highlights.
There is a clear upside to doing this; but it does mean that Apple ProRAW photos are fundamentally computational, and the notion of a single ISO or shutter speed for such a photo becomes quite fuzzy.
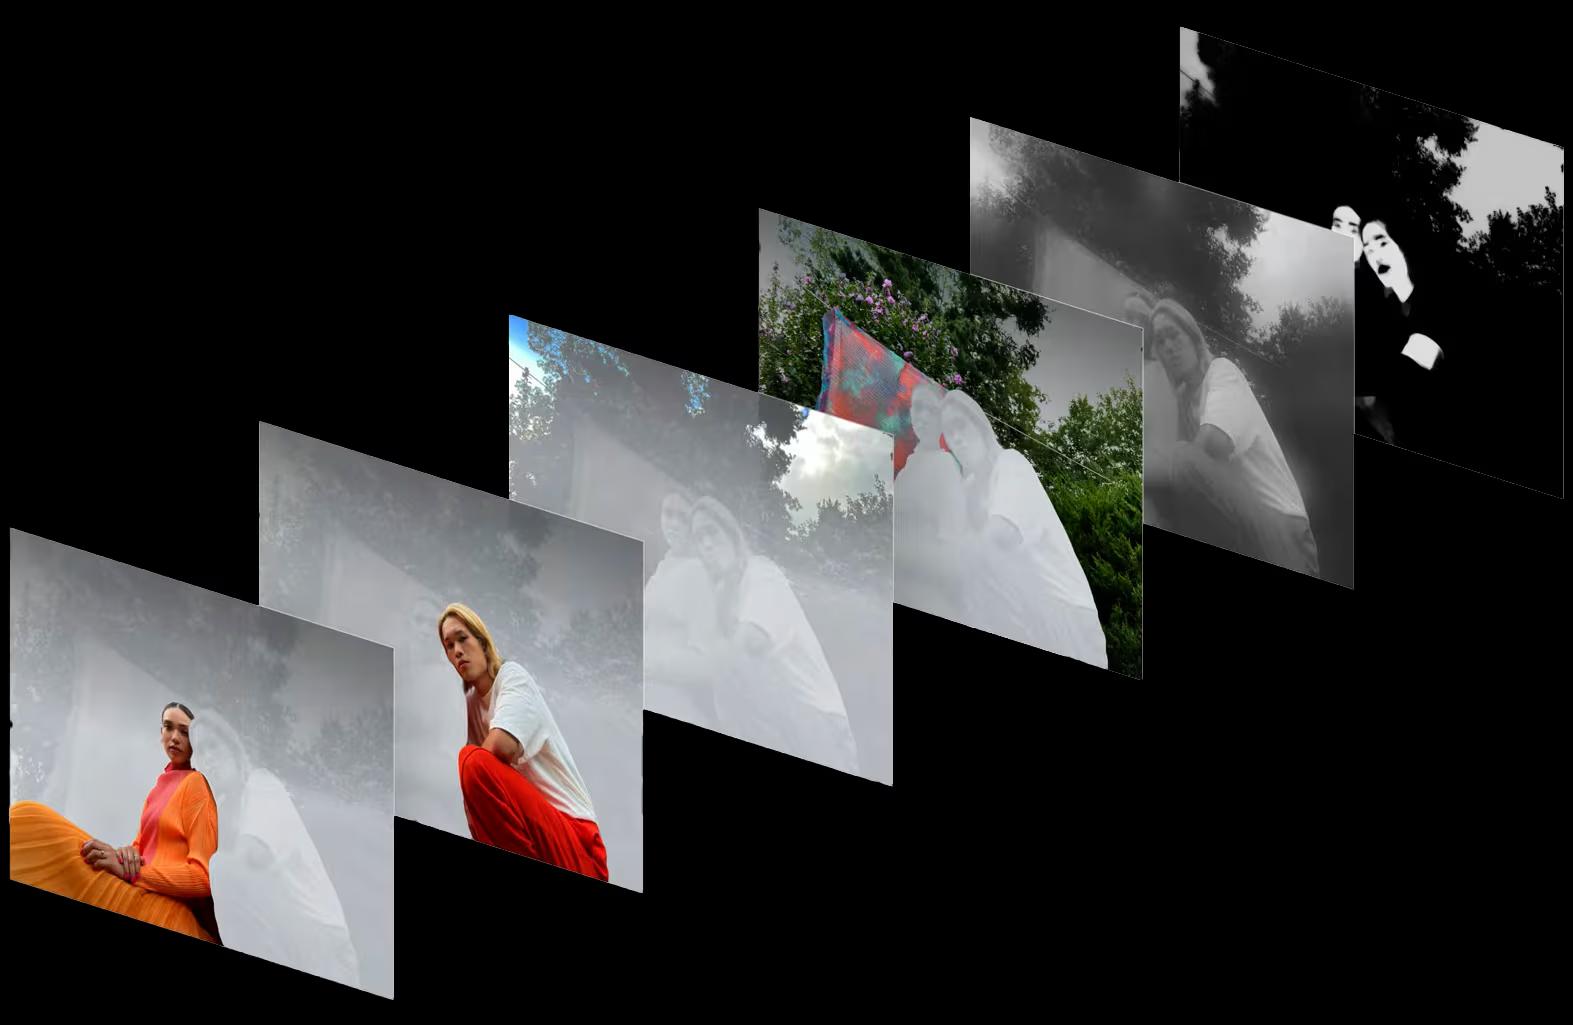
Finally, Apple ProRAW photos both include depth/semantic maps in their data, and make use of them for processing.
A depth map is an image that encodes the estimated physical depth for each pixel in the image. On iPhone, it is produced with a combination of physical sensing (LiDaR, stereo disparity) and AI.
A semantic map is an image that encodes what each pixel in the image might "mean", from a specified set of categories that are useful to photographic processing: sky, skin, hair, etc. Semantic maps are generated by on-device AI models.
These maps are then used to control the processing of the image, so that different corrections can be applied to different parts of the image (for instance, color balancing the sky is not the same as color balancing skin).
There are pros and cons to this kind of processing. However, it is undeniably entirely unlike the kind of processing that happens in film photography, or traditional digital photography, and is a key difference between what it means to shoot Bayer RAW vs Apple ProRAW.
A depth map is an image that encodes the estimated physical depth for each pixel in the image. On iPhone, it is produced with a combination of physical sensing (LiDaR, stereo disparity) and AI.
A semantic map is an image that encodes what each pixel in the image might "mean", from a specified set of categories that are useful to photographic processing: sky, skin, hair, etc. Semantic maps are generated by on-device AI models.
These maps are then used to control the processing of the image, so that different corrections can be applied to different parts of the image (for instance, color balancing the sky is not the same as color balancing skin).
There are pros and cons to this kind of processing. However, it is undeniably entirely unlike the kind of processing that happens in film photography, or traditional digital photography, and is a key difference between what it means to shoot Bayer RAW vs Apple ProRAW.
To wrap up, one format isn't "better" than the other; they just offer very different tradeoffs when it comes to capture and processing pipelines.
Apple ProRAW is best if you want the Apple's most advanced processing.
Bayer RAW is best if you want the unprocessed sensor reading, to which you can apply your own custom processing.
Apple ProRAW is best if you want the Apple's most advanced processing.
Bayer RAW is best if you want the unprocessed sensor reading, to which you can apply your own custom processing.