
PRO CAMERA APP
DEDICATED TO
BAYER RAW CAPTURE

USER'S MANUAL
Opening the Settings Pane
Full access to the settings requires a one-time purchase. This gets you all future app updates, forever.

You can access Bayer Cam's settings by tapping the button with the gear icon, to the leftmost side of the controls area.
This will bring you to a scrolling list of all of the app's settings, divided into sections.
Let's take a look at every section in details.
This will bring you to a scrolling list of all of the app's settings, divided into sections.
Let's take a look at every section in details.
Appearance

The first section is the theme picker, which lets you customize the colors used in the app's interface.
Tap the arrows to cycle through preset themes.
Tap the arrows to cycle through preset themes.

Tap any color to edit it. By default a Hue/Saturation/Lightness picker will open.

You can toggle between the HSL and Hexadecimal picker using the button above the confirm "OK" button.
Processing
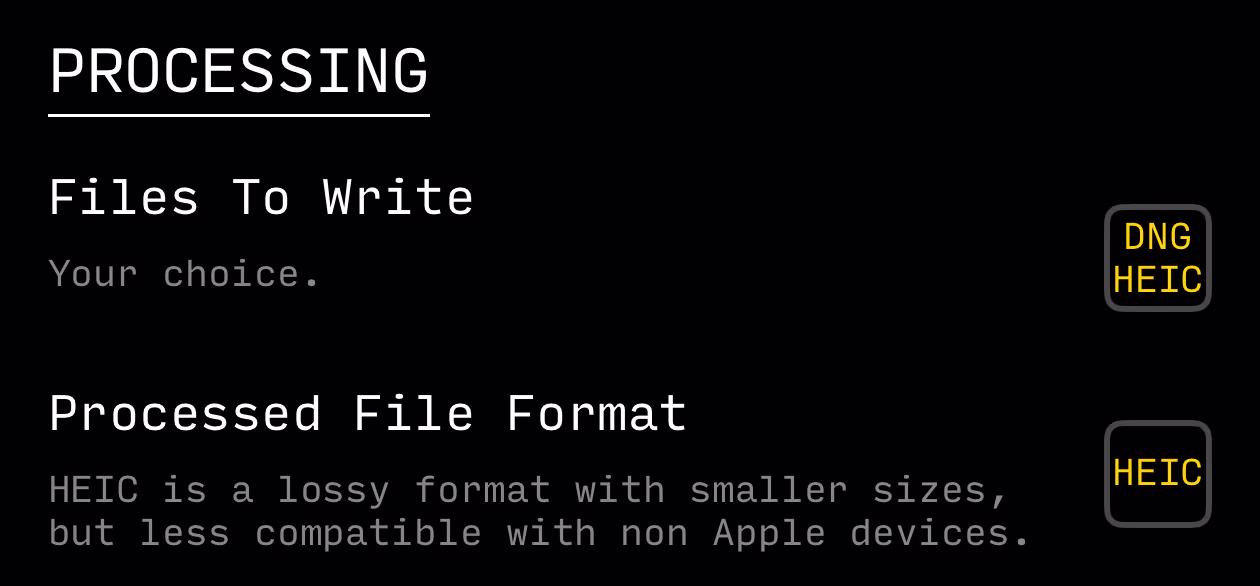
Bayer Cam always captures a RAW image, saved in the .DNG format.
It can also process that file (turn it into a screen ready image) and save it in a processed format: JPEG, HEIC, or TIFF.
The first setting in this section lets you specify whether only the DNG file gets written (default value), both the DNG file and processed file gets written, or just the processed file gets written.
The second setting, Processed File Format, lets you choose between HEIC, JPEG, and TIFF.
If Files To Write is set to DNG, then the other settings in this section will be disabled.

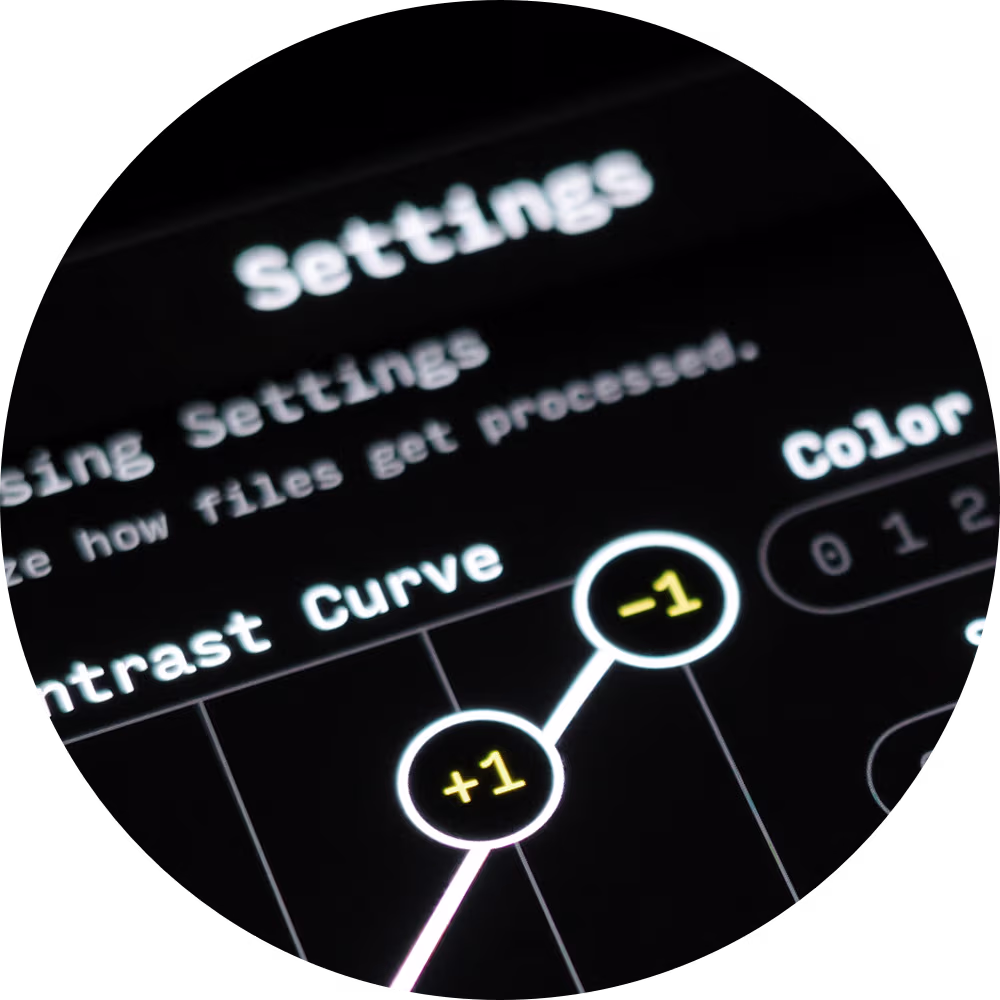
Processing Settings is a settings cluster that lets you define the appearance of the processed image through a 4-point contrast curve and 3 options.
The points on the contrast curve that can be set are, from left to right:
Floor (0 to +3)
Shadows (-3 to +3)
Highlights (-3 to +3)
Ceiling (0 to -3)
The points on the contrast curve that can be set are, from left to right:
Floor (0 to +3)
Shadows (-3 to +3)
Highlights (-3 to +3)
Ceiling (0 to -3)
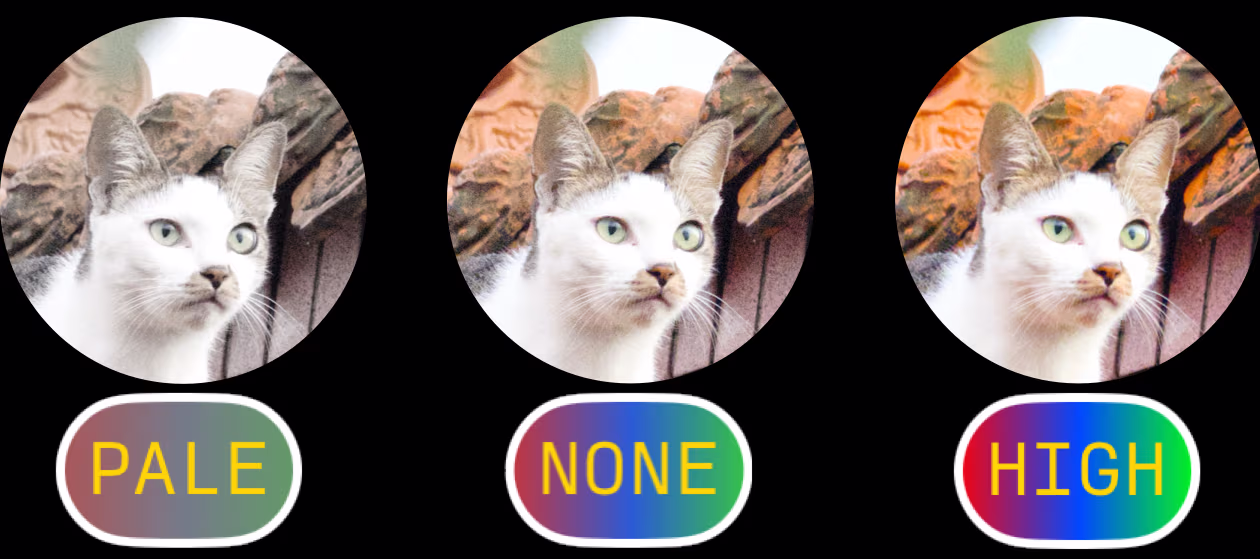
Color Boost determines the overall intensity shaping of the photo's colors.
There are 5 values: PALE, FADE, NONE (default), LOW, HIGH.
There are 5 values: PALE, FADE, NONE (default), LOW, HIGH.
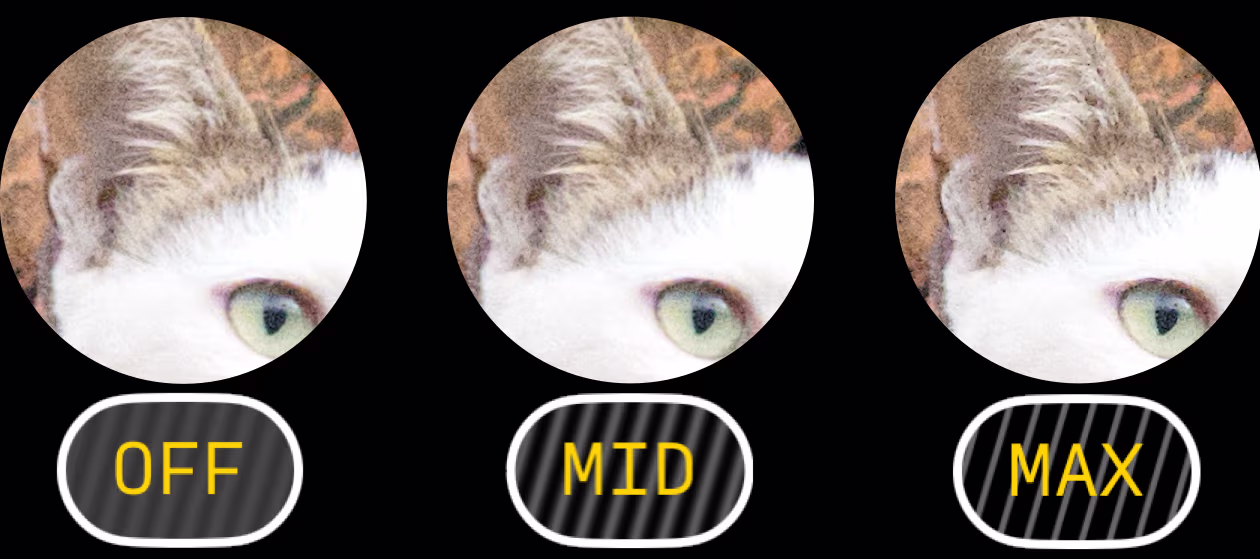
Sharpen determines how strongly details and edges from the RAW capture get enhanced.
There are 5 values: OFF, LOW, MID (default), HIGH, MAX.
Observe the tufts of fur on the ear and how they appear more delineated as the paramater increases.
Higher sharpening make details feel crisper, although sometimes at the risk of making it seem a bit artificial. Lower values soften the overall image.
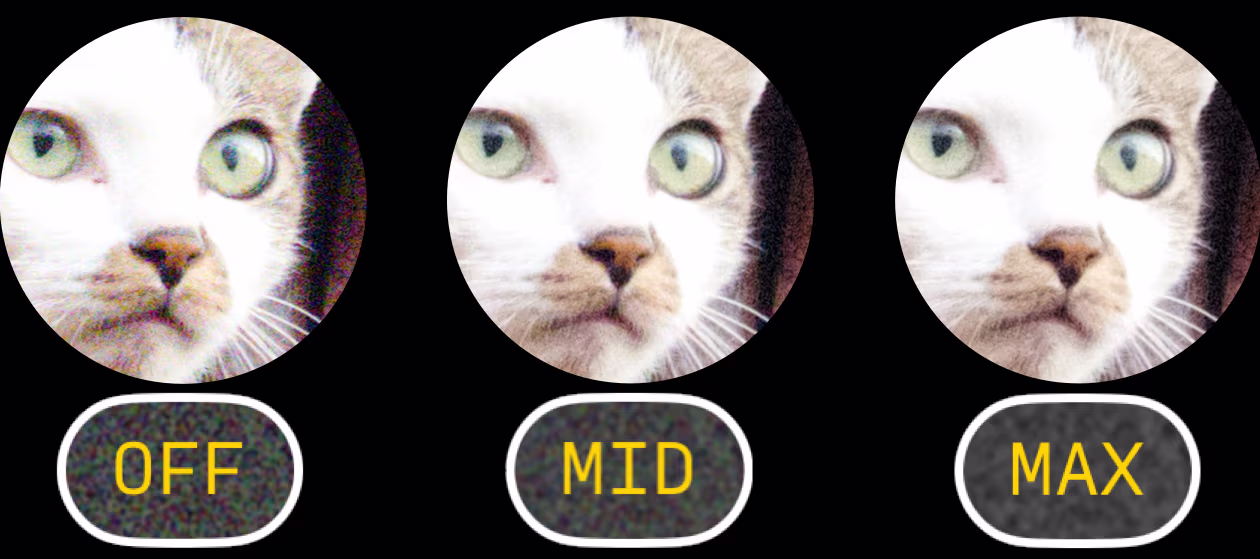
Noise Reduction determines how much the sensor noise from the RAW capture gets removed.
There are 5 values: OFF, LOW, MID (default), HIGH, MAX.
Observe the wall shadow to the right of the cat, and how the noisy colored pixels fade as the setting increases.
However, with increasing noise reduction, colors might get slightly distorted. Or you may want to preserve noise for aesthetic decisions.
Overlay
The Overlay is the set of information that gets overlaid on top of the viewfinder.It can be turned off/on at any time by using its dedicated button, or by pressing the physical Volume Up button on your device.
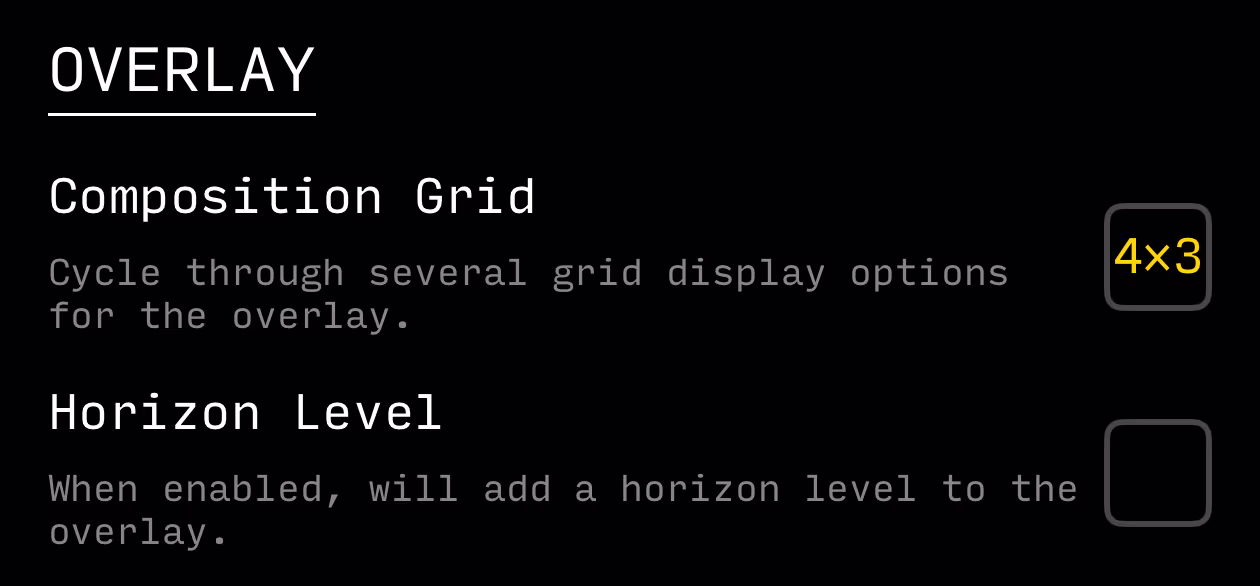
Options for the Composition Grid are 3×3, 4×4, 4×3, 8×6, or OFF.
The Horizon Level will show bars for alignment with the ground and the horizon, and provide haptic feedback (if enabled) when they come into alignment.


The Horizon Level will show bars for alignment with the ground and the horizon, and provide haptic feedback (if enabled) when they come into alignment.
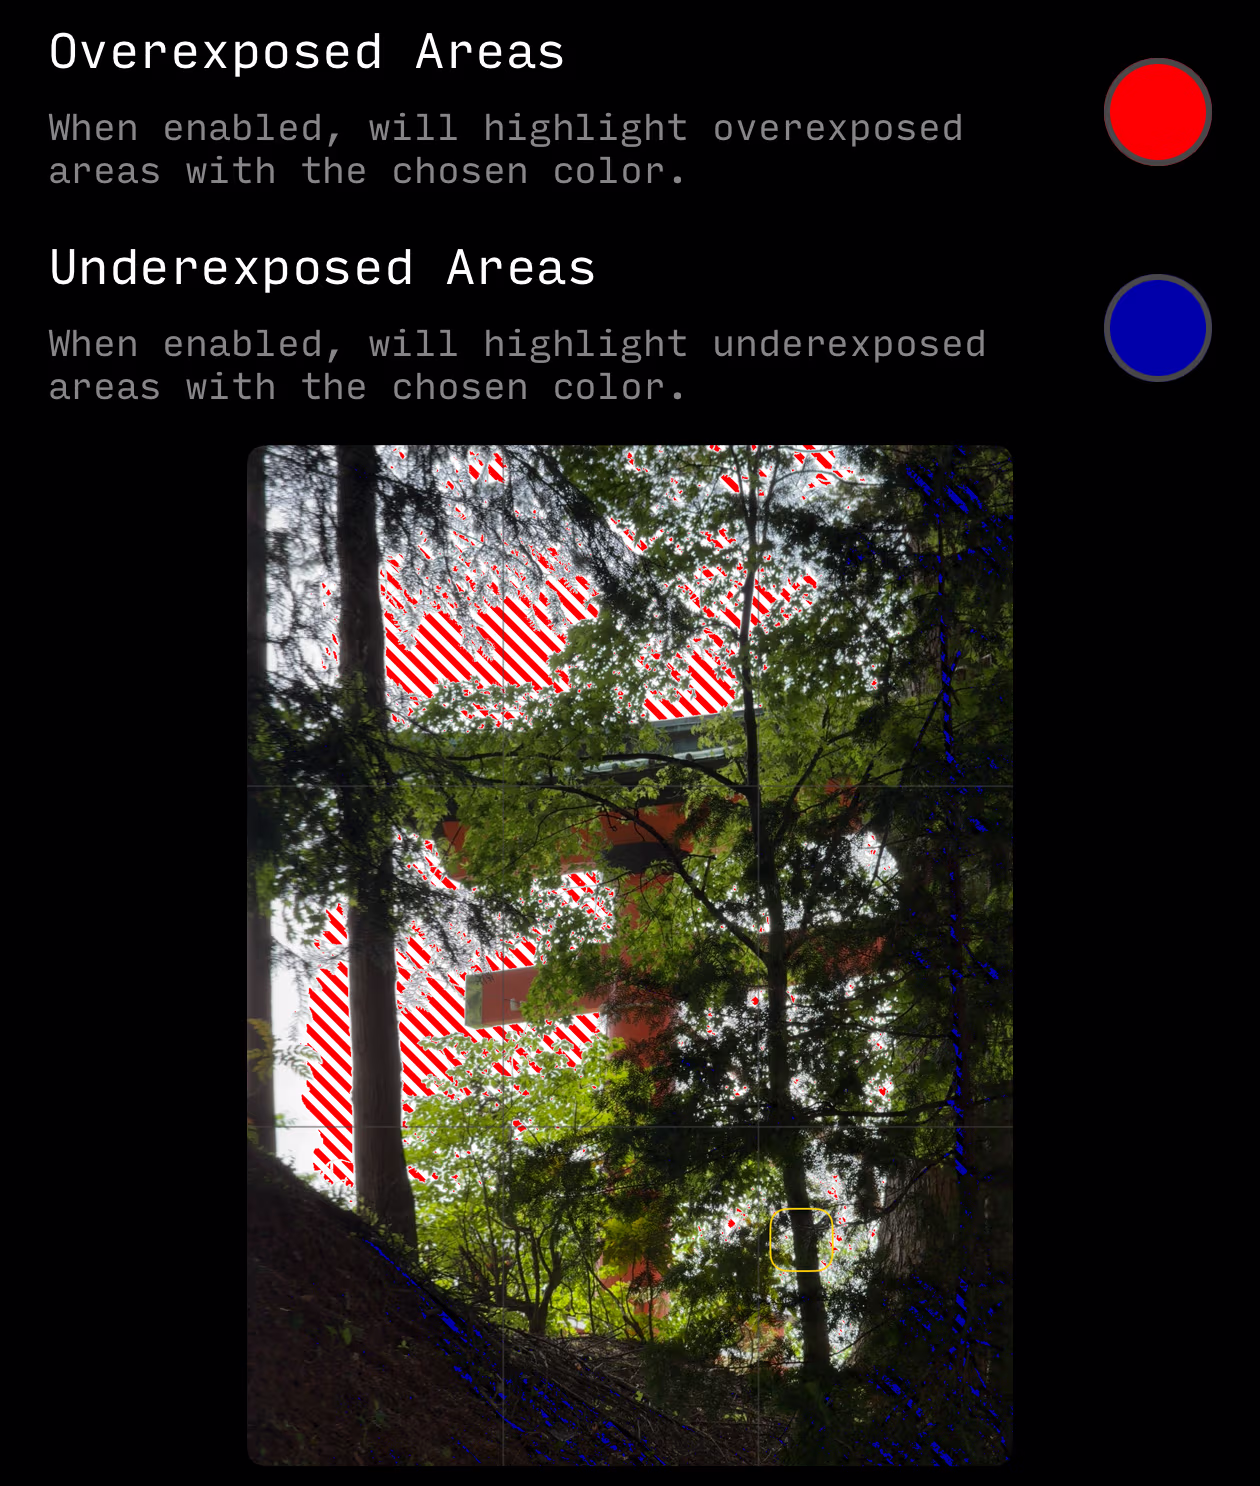
Overexposed/Underexposed areas, often called Zebras, will display stripes where all captured pixels will be black (underexposure) or white (overexposure).
No information can be recovered from those areas, so you want to be mindful of them when exposing your scene.
For overexposure, you can choose between red, orange, yellow, or black stripes.
For underexposure, you can choose between blue, dark green, purple, or white stripes.
No information can be recovered from those areas, so you want to be mindful of them when exposing your scene.
For overexposure, you can choose between red, orange, yellow, or black stripes.
For underexposure, you can choose between blue, dark green, purple, or white stripes.
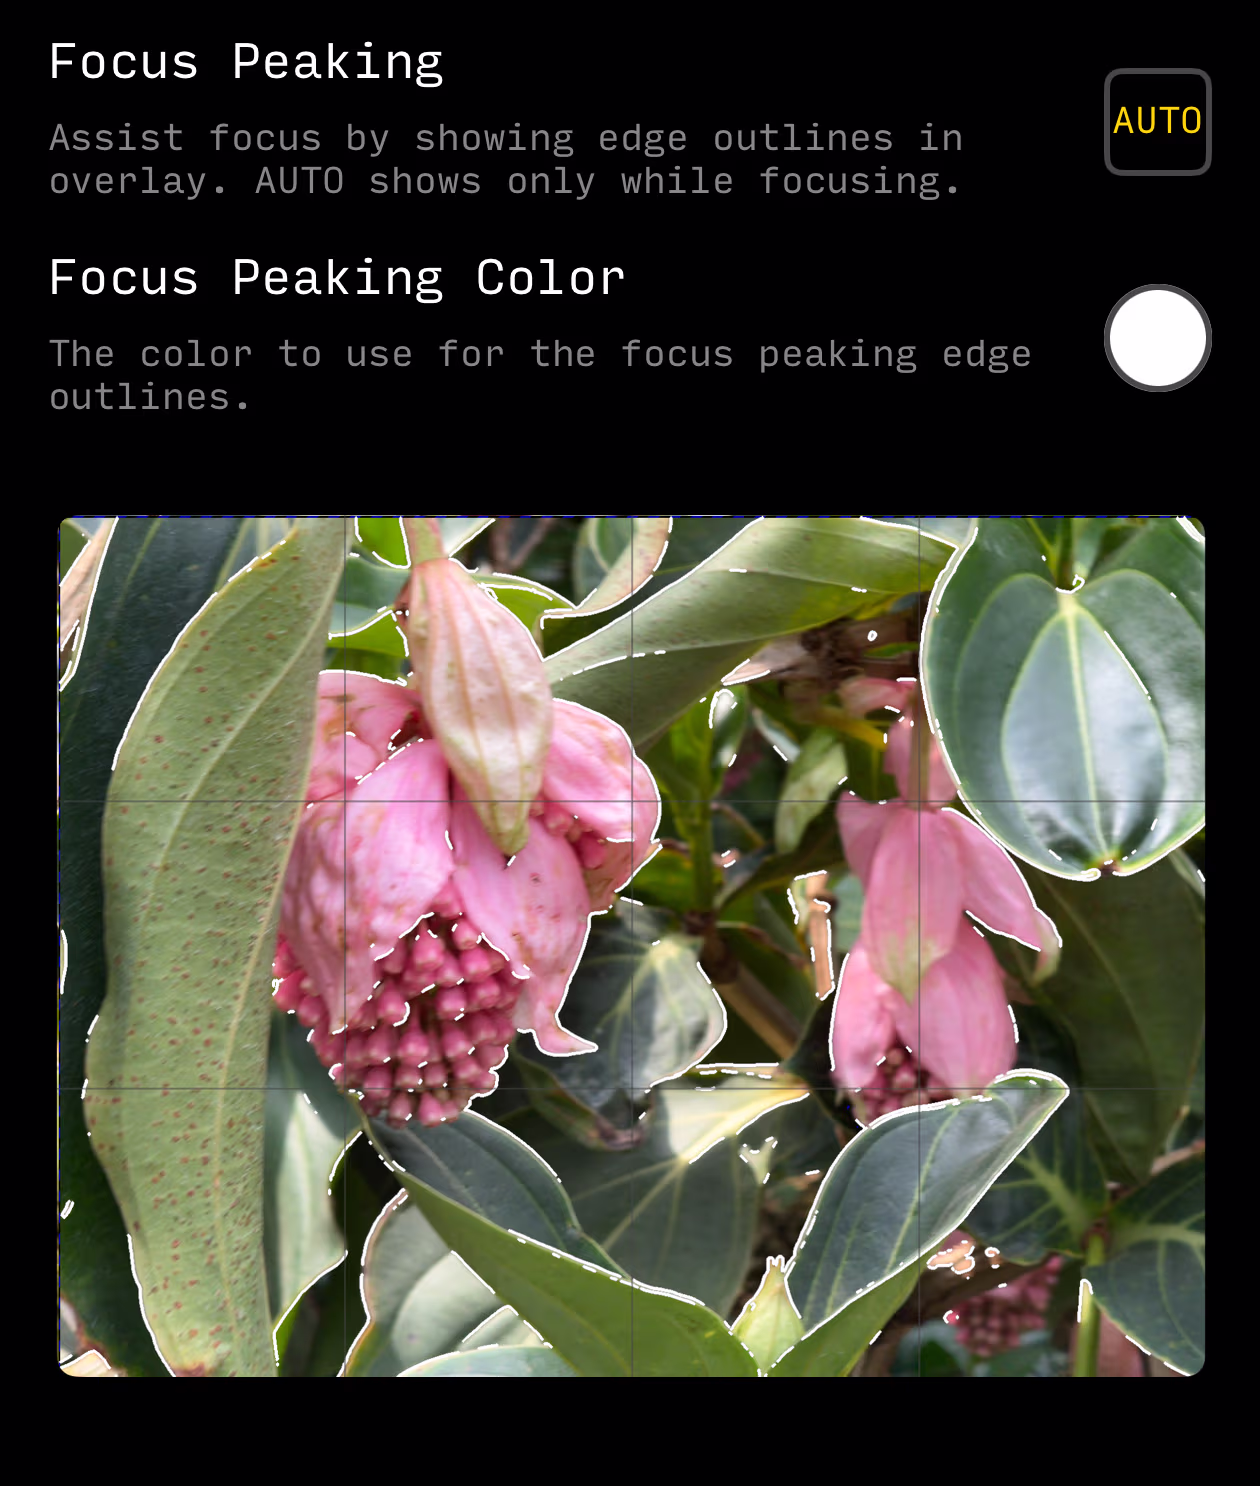
Focus Peaking helps you ensure your image is as sharp as possible by displaying highlights over edges in the image.
Values are OFF; ON (will always be displayed in the overlay), or AUTO (displayed only while actively using the manual focus control, including when the overlay is turned off).
Its color can be set to white, green, red, or cyan.
Values are OFF; ON (will always be displayed in the overlay), or AUTO (displayed only while actively using the manual focus control, including when the overlay is turned off).
Its color can be set to white, green, red, or cyan.
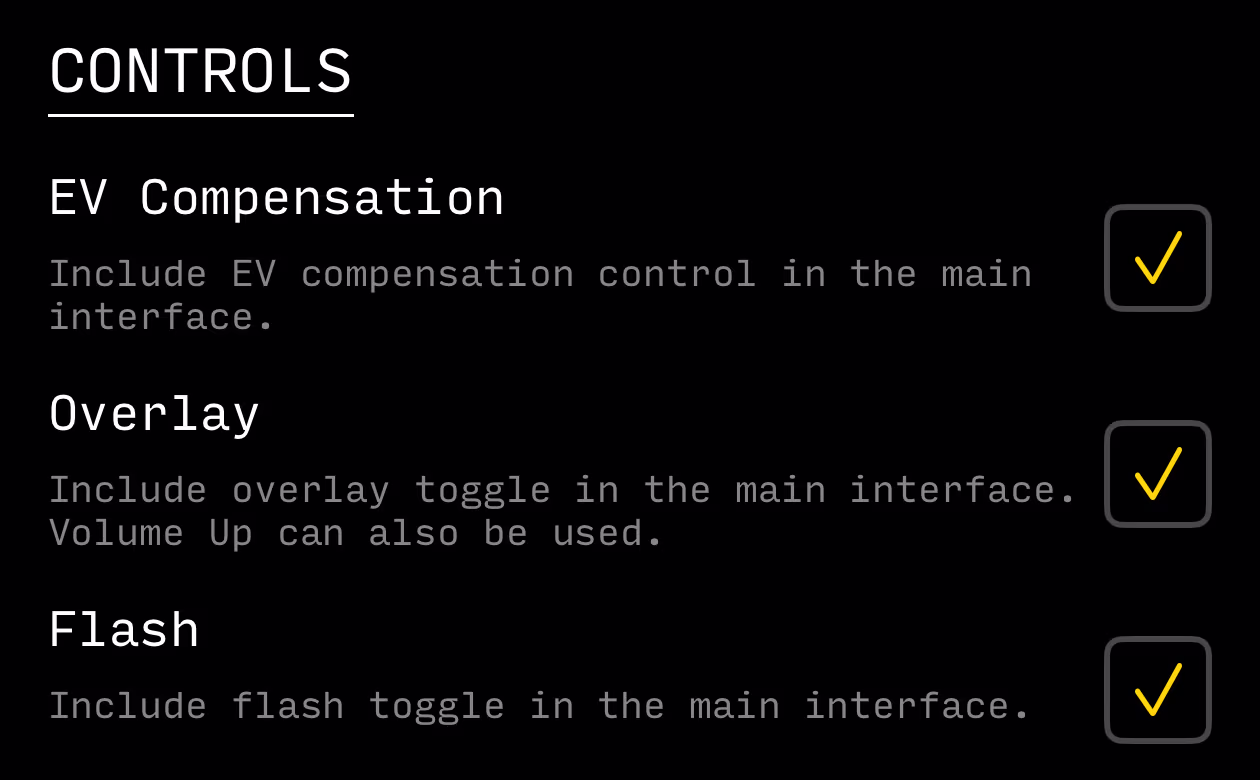
Controls
You can enable/disable these advanced controls on an individual basis to keep the interface uncluttered for your use. They will appear in the main camera interface.
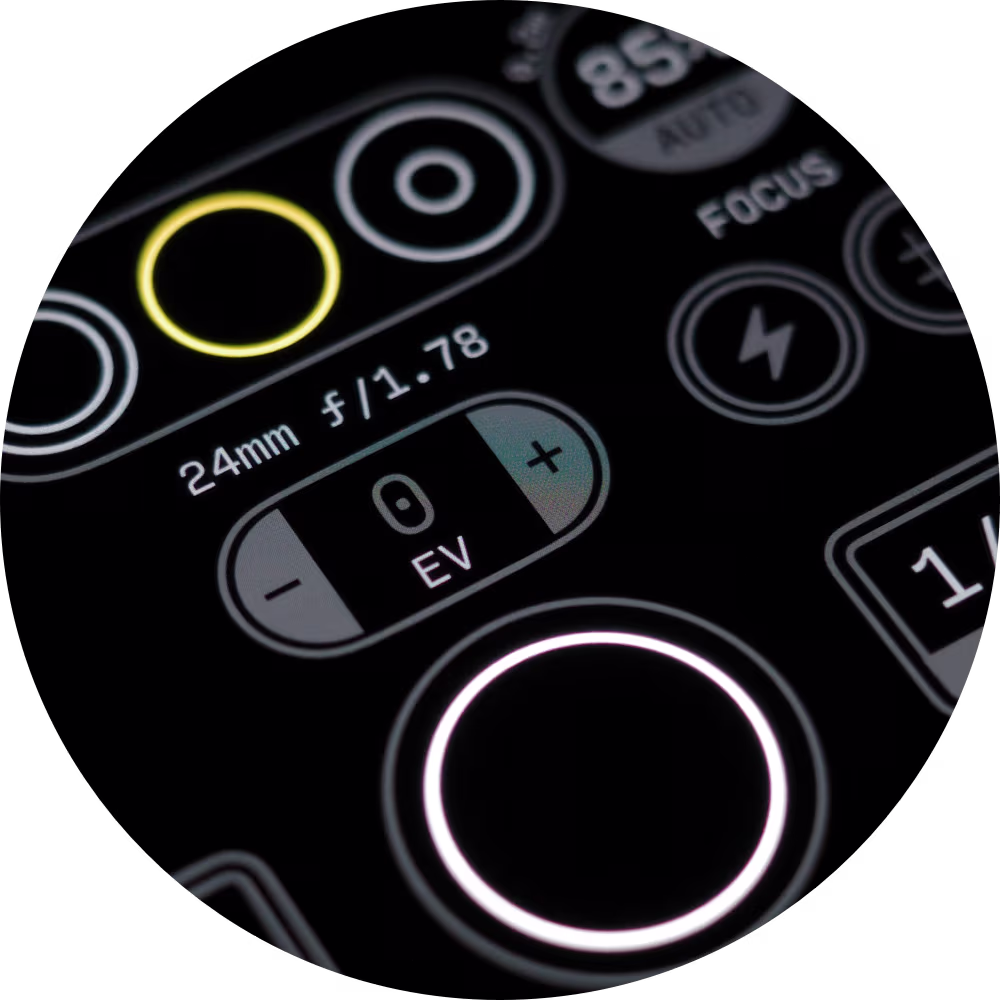
The EV Compensation dial appears above the shutter button and lets you manually specify an EV offset, in stops.
If both the ISO and Shutter Speed dials are set to MANUAL, the EV Compensation dial is temporarily disabled.
Just like for the ISO and Shutter Speed dials, you can press and hold it to quickly restore it to its default value.
If both the ISO and Shutter Speed dials are set to MANUAL, the EV Compensation dial is temporarily disabled.
Just like for the ISO and Shutter Speed dials, you can press and hold it to quickly restore it to its default value.
The Overlay toggle lets you show or hide the overlay.
Note that regardless of whether this control is present, you can toggle the overlay with the physical Volume Up button on your device.
Note that regardless of whether this control is present, you can toggle the overlay with the physical Volume Up button on your device.
The Flash toggle lets you turn the flash on and off.
Capture
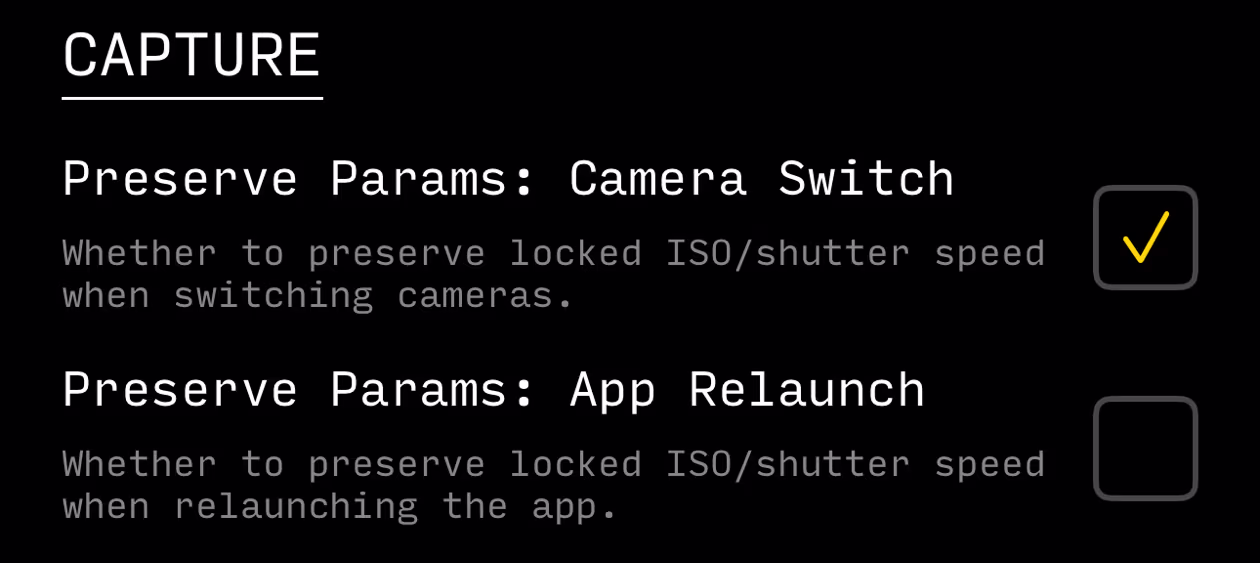
The first two settings in this section pertain to preserving the values of the ISO and Shutter Speed dials when switching cameras, or when the app is launched fresh.
On devices with only one rear camera, the Preserve Params: Camera Switch setting will be disabled.
On devices with only one rear camera, the Preserve Params: Camera Switch setting will be disabled.
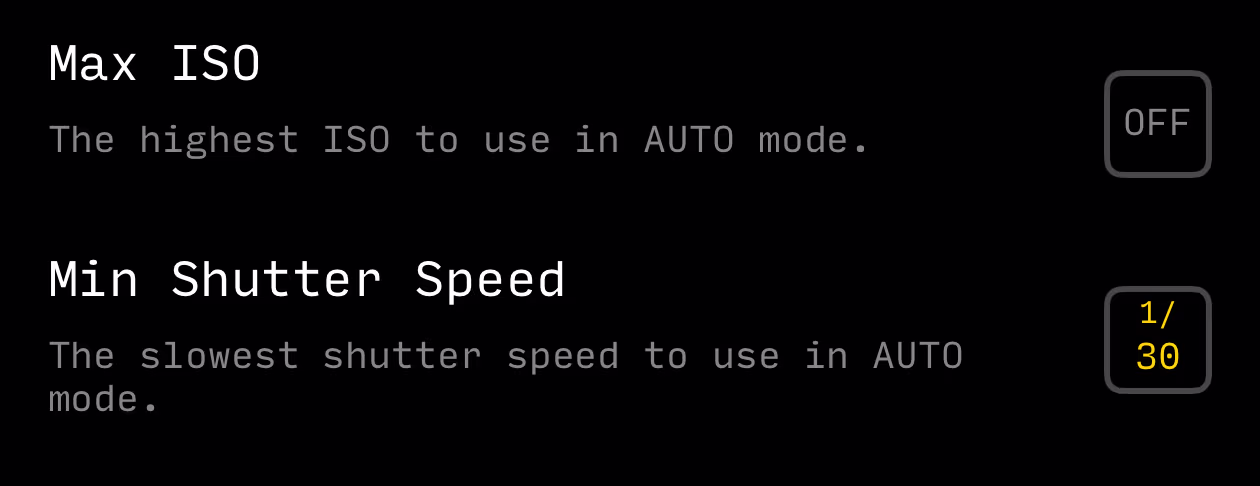
The two following settings let you specify a Max ISO to be used when the ISO dial is set to AUTO - values are ISO 100, ISO 400, and ISO 1600.
You can also specify a Minimum Shutter Speed to be used when the Shutter Speed dial is set to AUTO - values are 1/30 and 1/100.
You can also specify a Minimum Shutter Speed to be used when the Shutter Speed dial is set to AUTO - values are 1/30 and 1/100.
These settings are useful when shooting in low light, where you want the auto-exposure to have some leeway but you don't want blurriness due to shake (Min Shutter Speed), or excessive sensor noise (Max ISO).
If a parameter reaches its limit set through this setting, the UI will signal it by showing "AUTO LIMIT" in the relevant dial.
If a parameter reaches its limit set through this setting, the UI will signal it by showing "AUTO LIMIT" in the relevant dial.
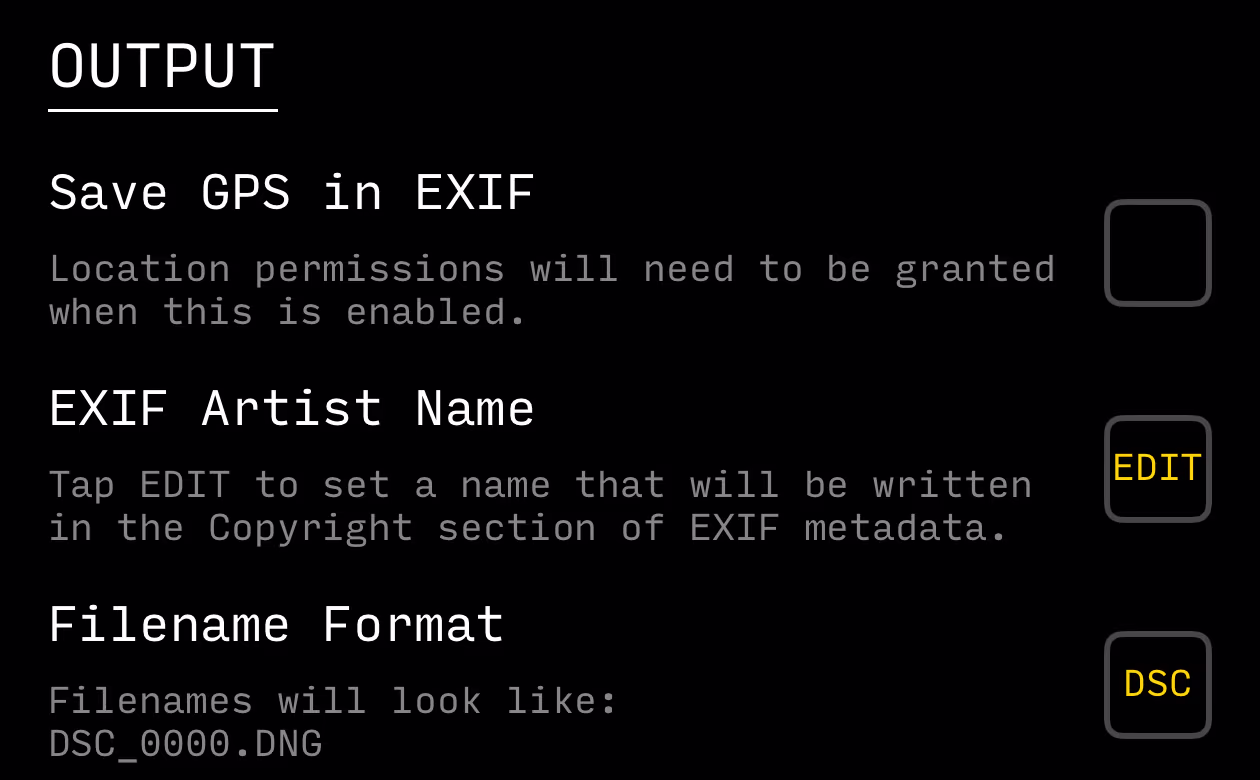
Output
Settings pertaining to how the file output gets written.
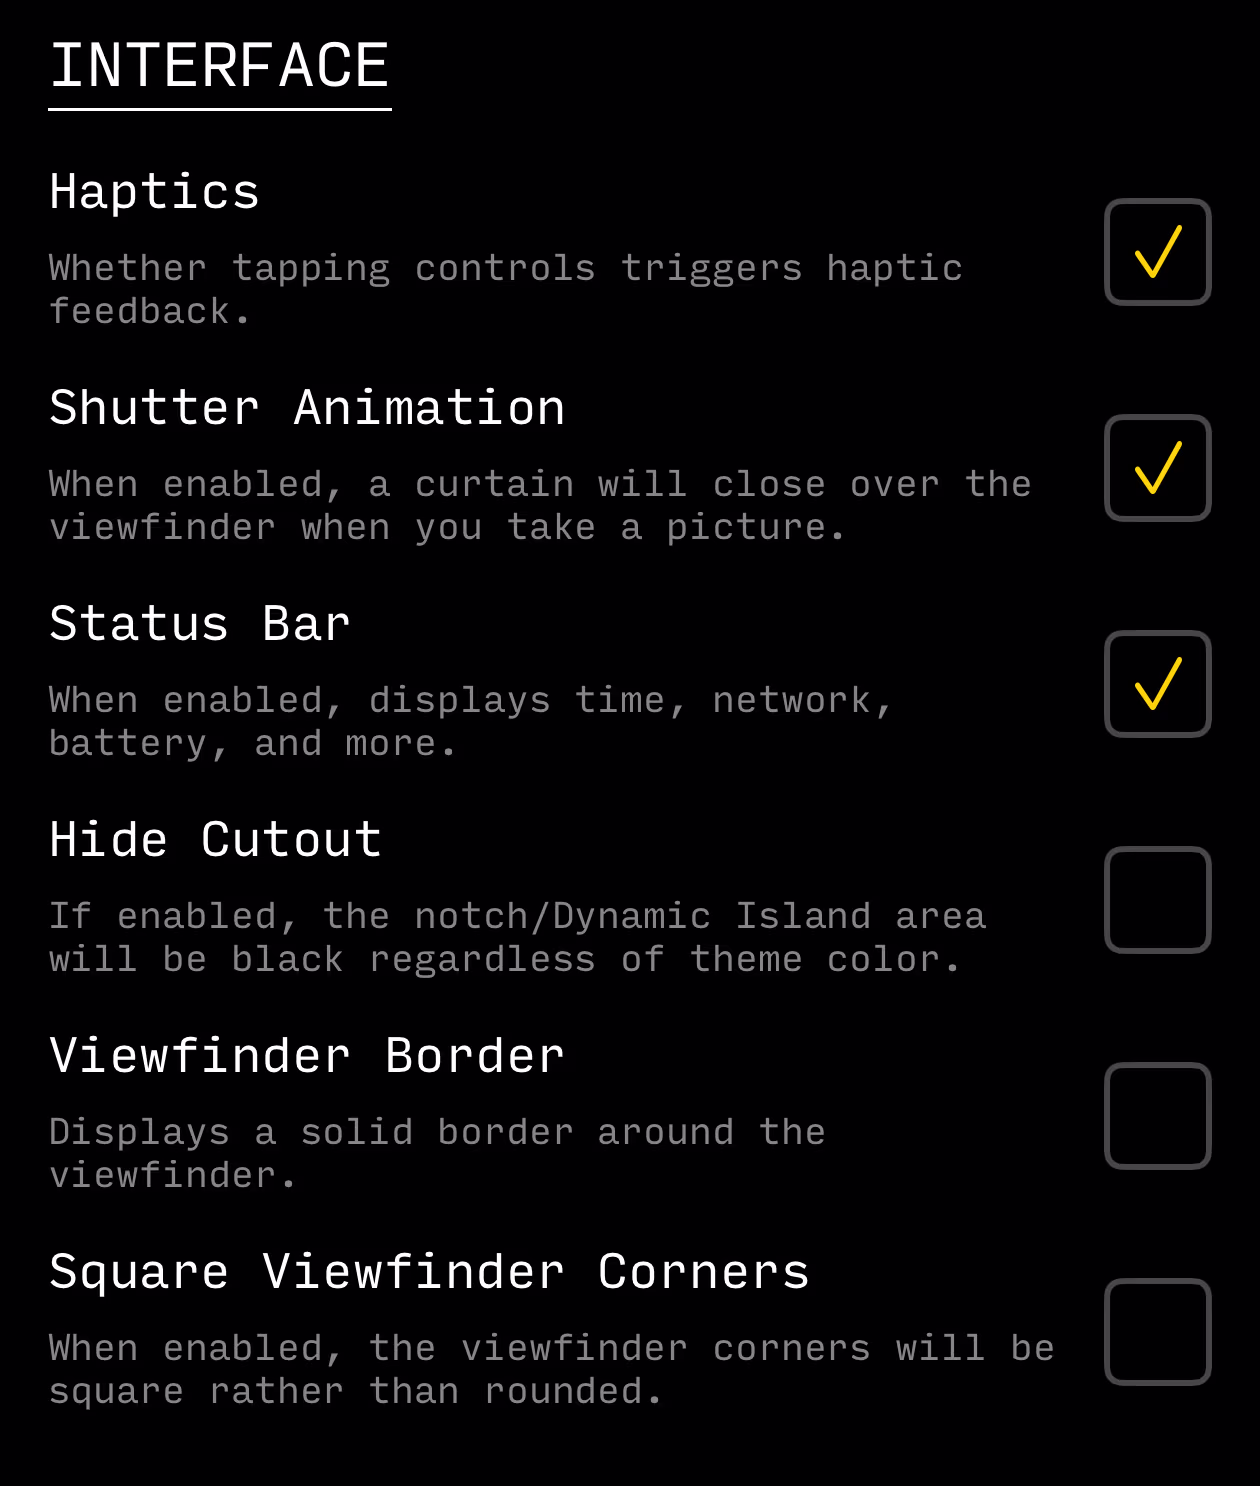
Interface
The final section, Interface, contains a variety of settings that let you customize the app interface.
App Icon
You can change the icon for the app! Just tap on the one you would like to use.